
Learning Linux Virtualization With a VMware Ubuntu Install
Running a virtual machine (VM) natively on your Ubuntu hardware has many benefits over running it on a server. Some of those benefits are reducing latency and increasing I/O performance. Why not create a VM with VMware on Ubuntu and install a guest OS?
VMware is one of the most common methods for running a VM on Ubuntu. Not sure how? Worry not. In this tutorial, you will learn more about virtualization with VMware Ubuntu Install.
Read on to supercharge your Ubuntu VM experience!
Prerequisites
This tutorial comprises hands-on demonstrations. To follow along, ensure you have the following:
- An Ubuntu machine – This tutorial uses Ubuntu 20.04, but the steps should be similar for other versions.
Related:How to Install Ubuntu 20.04 [Step-by-Step]
Ensure your machine meets the requirements below for VMware to work correctly:
VMware Workstation System Requirements
64-bit x86 processor with Intel VT-x or AMD-V technology enabled in the BIOS
Minimum 4GB of system RAM (8GB recommended)
At least 10GB of free space for each Linux virtual machine you create and 40GB for each Windows VM.
- An ISO image of the installation media for the OS you want to install in your VM – This tutorial uses Windows 10, but you can use any ISO you like.
Downloading VMware Workstation
VMware Workstation is a type-2 hypervisor that runs on top of an existing OS (Linux or Windows) that lets you create and run multiple VMs on a single machine. This hypervisor helps you save time and money by consolidating multiple physical servers into VMs.
Before using VMware Workstation, you must download and install it on your machine.
VMware offers two versions of its product, as follows:
Version
Description
Workstation Player
Free for personal use.
Workstation Pro
Requires a license key for activation. This version has a 30-day free trial (full-featured).
But in this tutorial, you can use the Pro version’s free trial, so you can later decide whether to purchase a license key.
1. Open your favorite web browser, and visit VMware’s official download page.
2. Next, click DOWNLOAD NOW under the Workstation 16 Pro for Linux section to download the .bundle file. A bundle file is an executable file that contains all the files needed to install a program on any Linux distribution quickly.
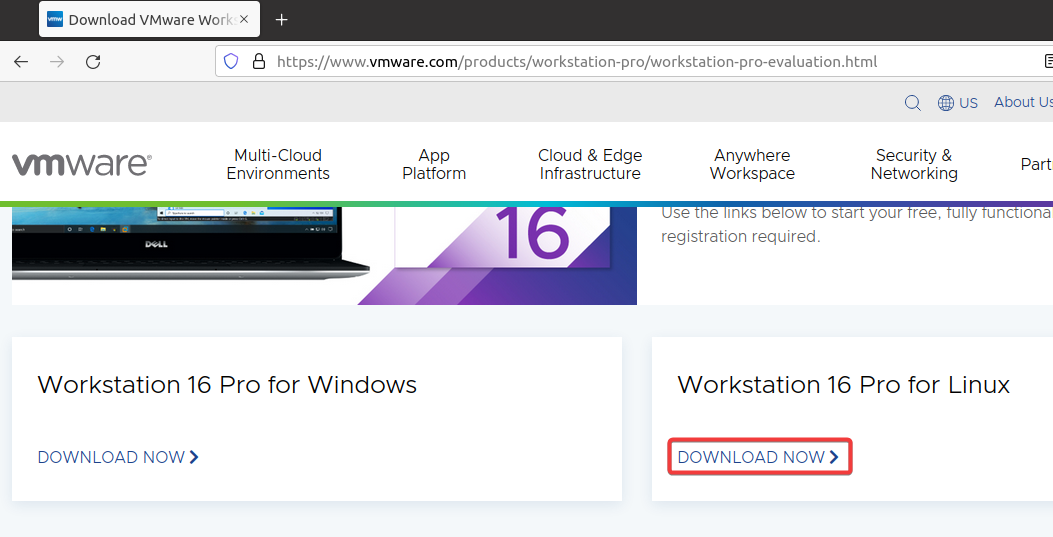
VMware Ubuntu Install : Downloading the VMware workstation .bundle file
3. Once downloaded, run the ls command below to verify the .bundle file is in your ~/Downloads directory.
ls ~/Downloads/VMware*You will see a similar output as below. At the time of this writing, the latest VMware Workstation version is 16.

Verifying has been downloaded
Related:Linux Directory Commands : A Complete Guide
Installing VMware Workstation On Ubuntu
Now that you have downloaded the VMware bundle, it is time to install it. But first, you need to make the .bundle file executable. By default, Ubuntu does not allow you to run any program unmarked as executable.
1. Open your terminal, and run the chmod command below, which does not provide output but changes the file permissions of the .bundle file. This command makes the file executable (+x).
Related: Manage Directory and File Permissions with Chmod Recursive
chmod +x ~/Downloads/VMware-Workstation*2. Next, run the below [apt install](https://linuxize.com/post/how-to-use-apt-command/#installing-packages-apt-install) command to install the gcc compiler and other essential development tools (build-essential). These tools are required to build the VMware kernel modules.
Related:Learning Ubuntu Apt Get Through Examples

Installing GCC compiler and essential development tools
3. Once installed, run the command below to extract the VMware bundle on your system. Ensure you replace VMware-Workstation-Full-16.2.4-20089737.x86_64.bundle with your VMware bundle name.
sudo ./VMware-Workstation-Full-16.2.4-20089737.x86_64.bundle
Extracting the VMware bundle
4. Now, from the Activities overview, search for VMware, and click on the VMware Workstation icon, as shown below. The first time you launch VMware Workstation, the installation wizard opens (step five).
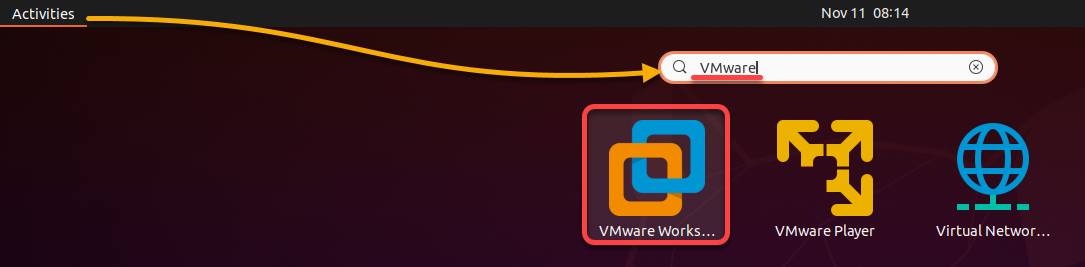
Launching VMware Workstation
5. On the VMware Workstation installation wizard, select the first option to accept the End User License Agreement (EULA) and click Next.
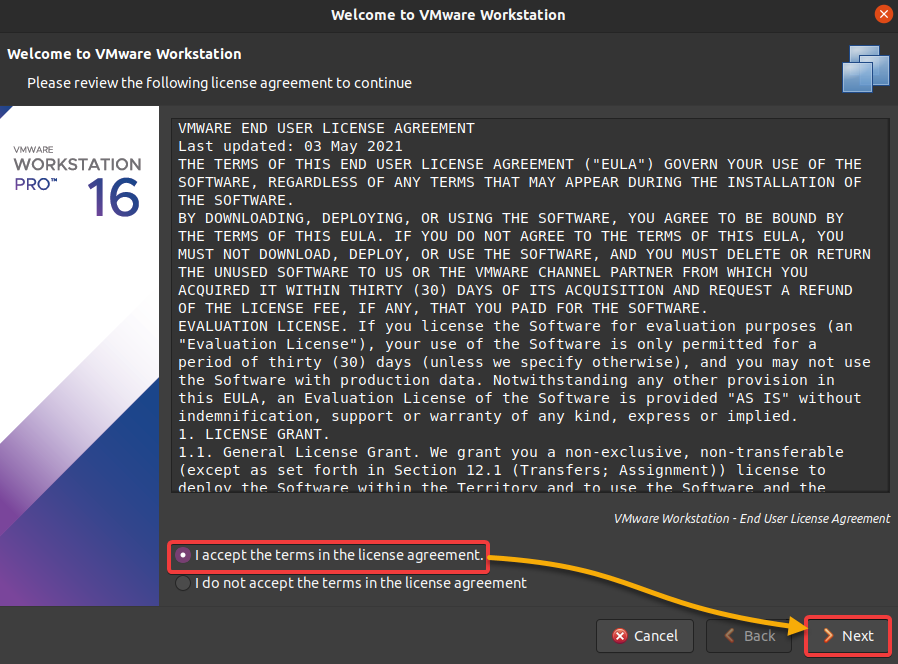
Accepting the license agreement
6. Next, select Yes to enable the VMware automatic updates on startup, and click Next.
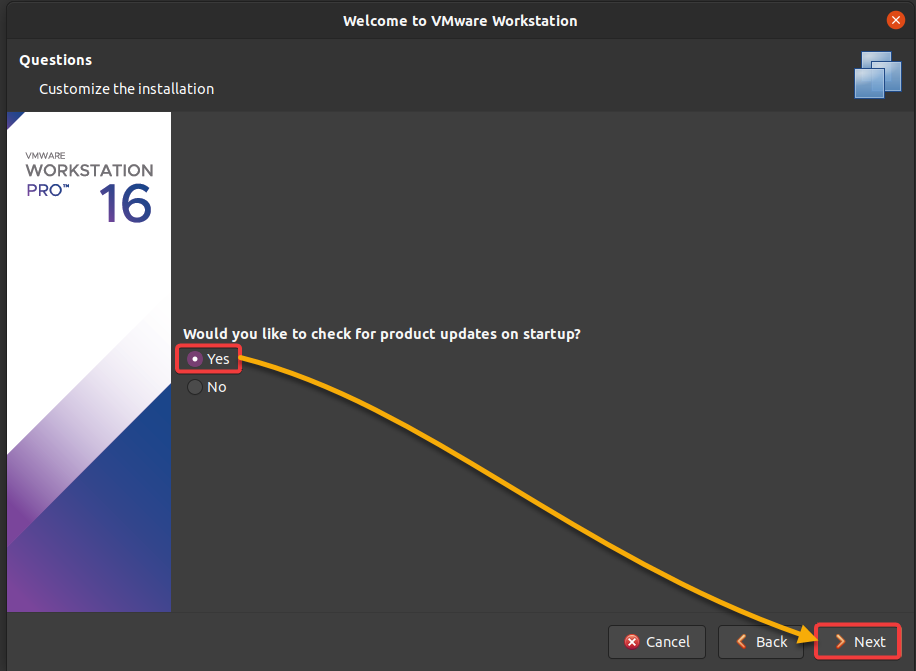
Enabling the VMware automatic updates
7. Select Yes if you wish to join the VMware customer experience improvement program, and click Next.
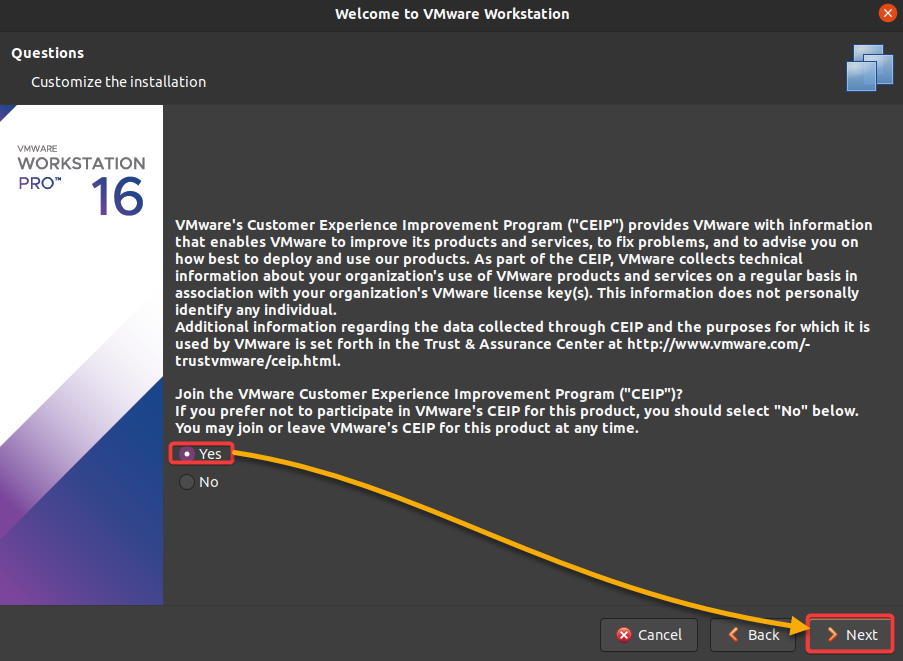
Joining the VMware customer experience improvement program
8. Next, select the bottom option to try VMware Workstation 16 for 30 days, and click Finish. Or choose the first option, and enter the Pro license key if you have one.
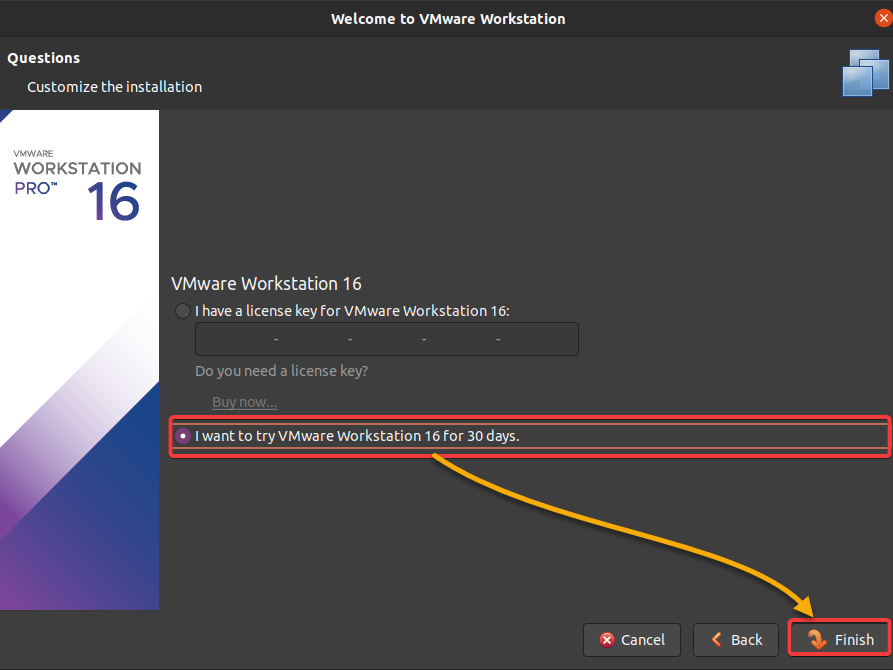
Enabling the trial version
9. Lastly, enter your user account password, and click Authenticate when prompted to authenticate the installation.
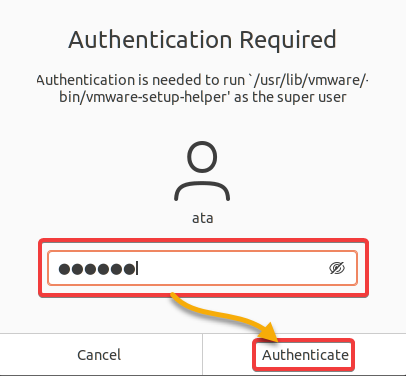
Authenticating the installation
Once the installation completes, the main window of VMware Workstation shows up, as shown below.
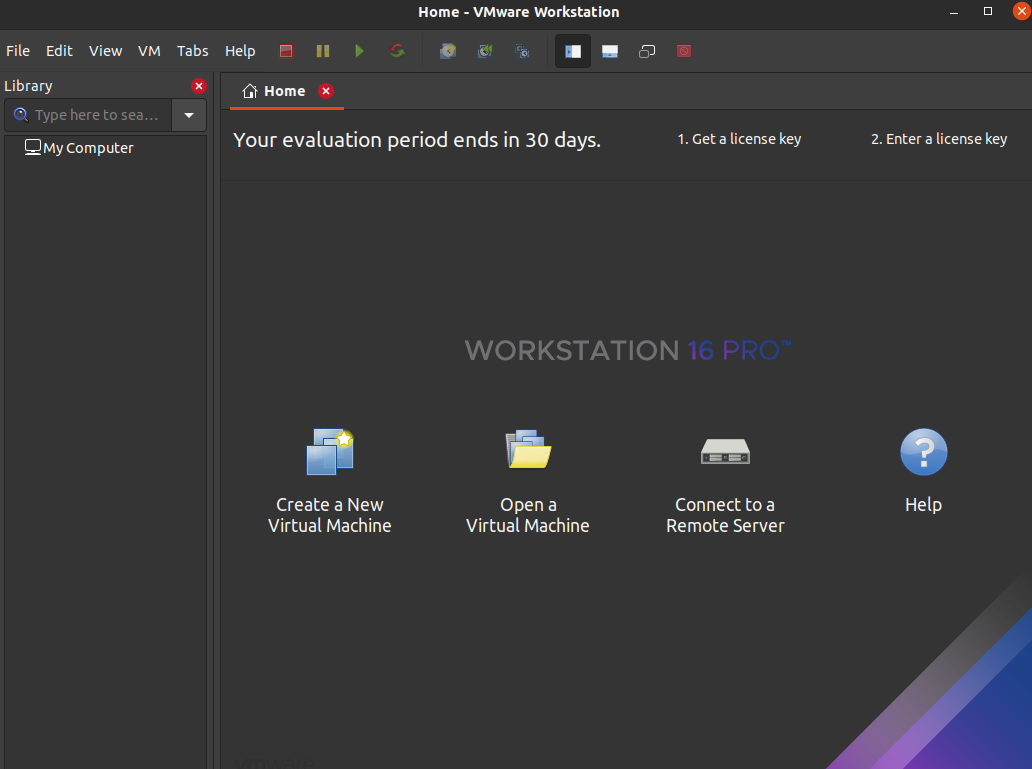
Viewing the main VMware Workstation window
Creating a VM on VMware Workstation
Now that you have installed VMware Workstation, you are ready to create your first VM and start saving on hardware costs. You can either create a single or multiple VMs on your machine. With a VM, you can test applications that might damage or delete data on the physical computer.
To create a VM on VMware Workstation:
1. Click Create a New Virtual Machine on the main window, which opens a wizard to configure your new VM (step two).
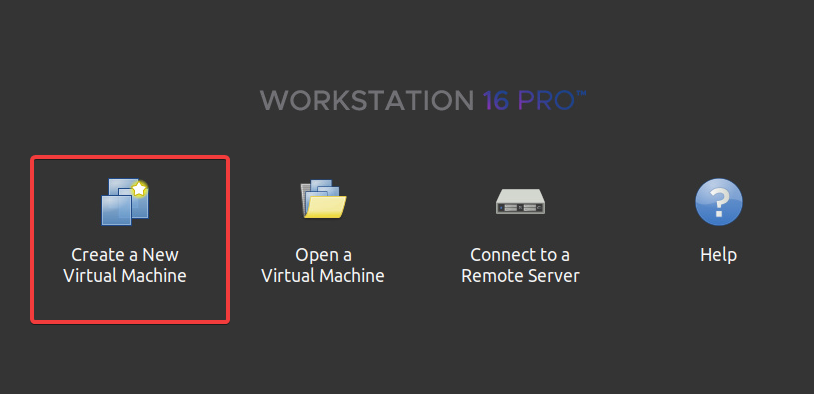
Initiating creating a new VM
2. Next, select the Typical option, and click Next. This option lets you create a new VM with the recommended configuration for most users, especially for first-timers.
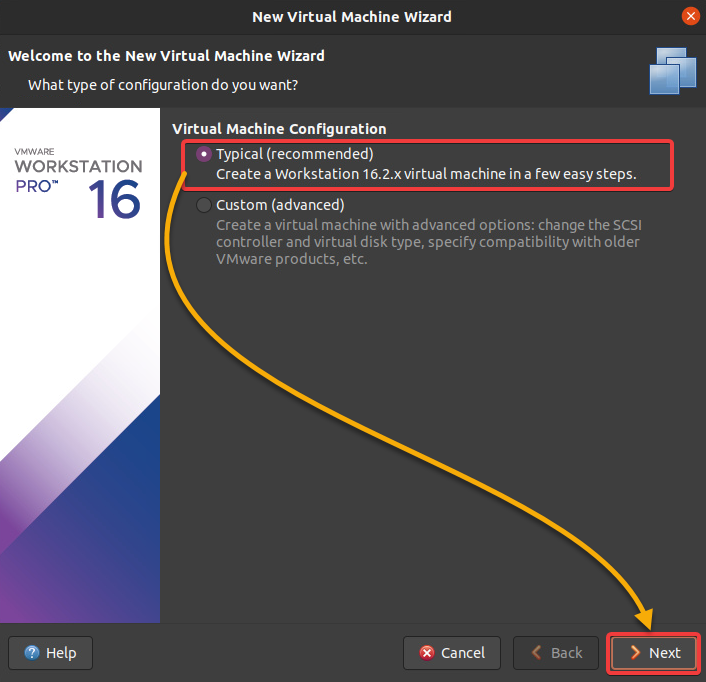
Choosing a VM configuration
3. Select the Use ISO image option on the next screen, click Browse to locate your Windows ISO file, and click Next.
This setting lets you choose the OS you want to install on your VM.
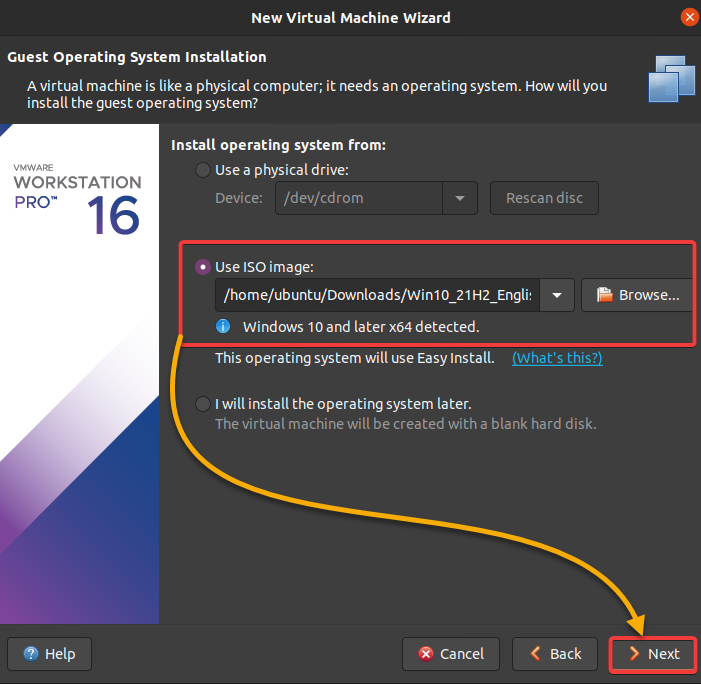
Selecting the ISO image file
4. Now, configure the Windows install information as follows:
- Windows product key – Enter a Windows product key if you have one. If none, leave this field blank and click Next.Version of Windows to install – Select the version of Windows you are installing. This tutorial uses Windows 10 pro.Full name and Password – Provide, and confirm your preferred login credentials for your VM.Keep other settings as is, and click Next.
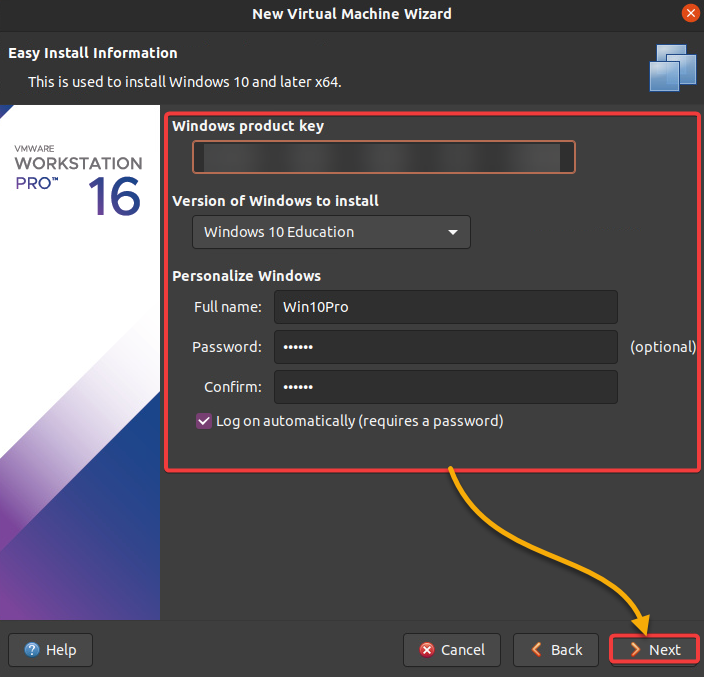
Configuring the Windows install information
5. Configure the VM settings with the following, and click Next.
Name
A descriptive VM Name to identify the virtual machine on your system.
Location
A location where VMware Workstation stores all files related to your VM.
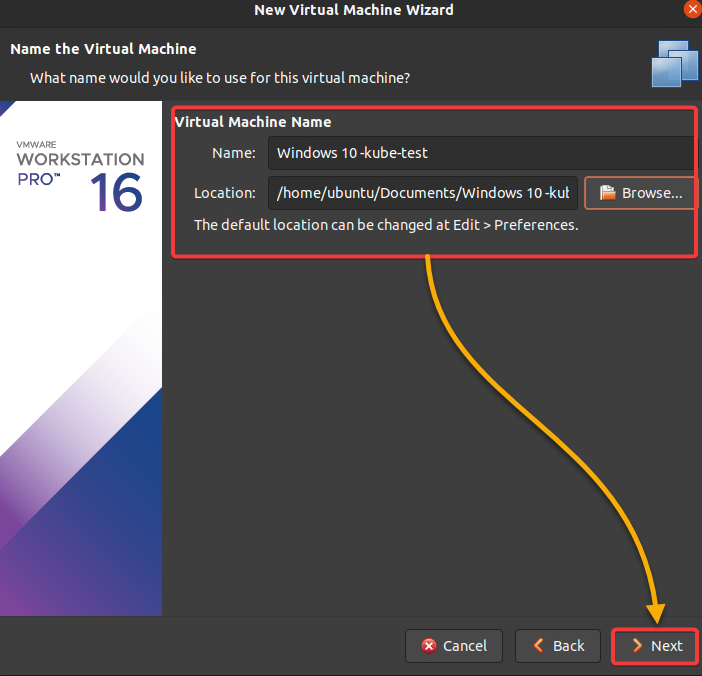
Configuring the name and location of the VM
6. Next, configure your VM’s disk capacity with the below information, and click Next.
Maximum disk size
Set the maximum amount of space (in GB) the VM can use, which is the size of the virtual hard disk (VHD) that will be created for your VM. Allocating at least 40 GB is recommended for a VM.
Store virtual disk as a single file
Select this option to store the virtual disk as a single file on your computer.
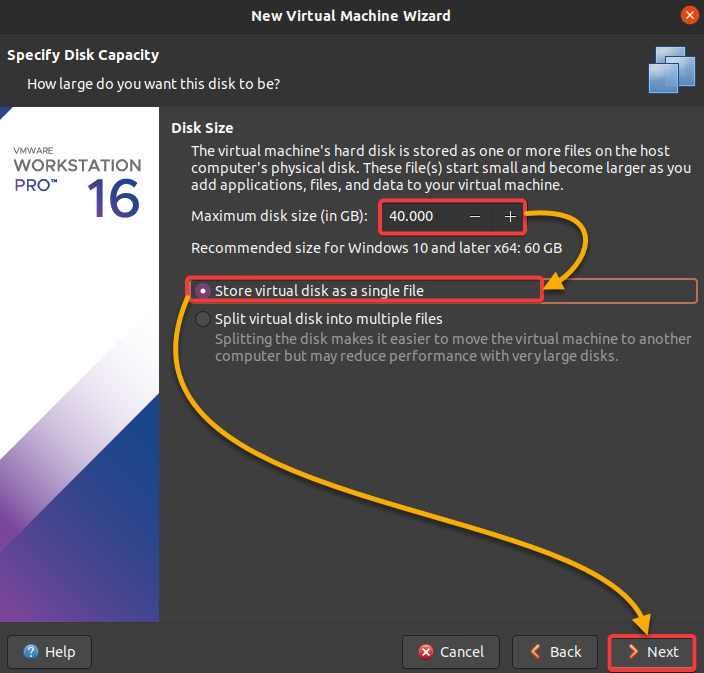
Configuring VM disk size
7. Finally, review your settings, click Back to change any of the settings, or click Finish to create your VM. If you keep the checkbox at the bottom enabled, your VM starts up automatically.
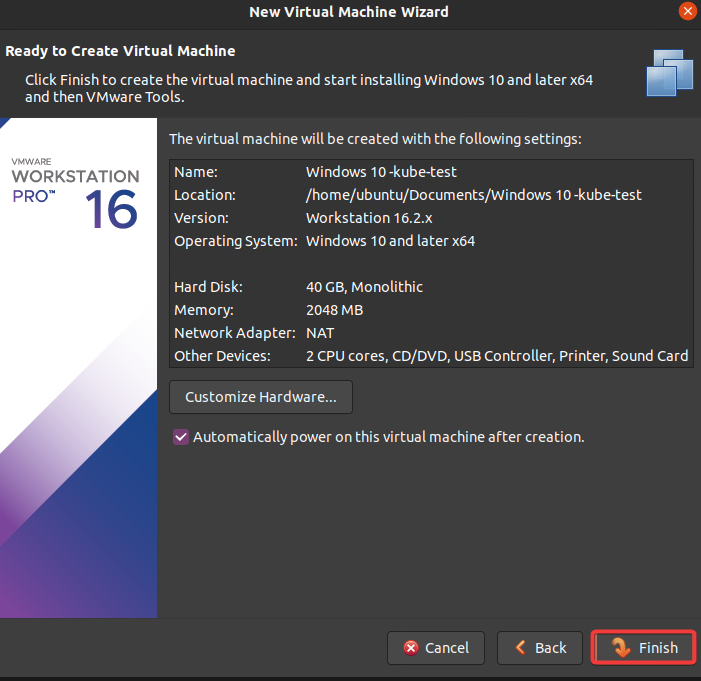
Reviewing the settings and creating the VM
If successful, you will see the new virtual machine listed in the Library navigator (left panel) of the main window, as shown below. Moreover, your guest OS is booting up if you see the Windows logo in the console. Congratulations! You have now created your first VM in VMware Workstation Pro.
💡 The next step is to install Windows on the VM, which is out of the scope of this tutorial. But installing Windows on a VM is just like how you would on any computer.
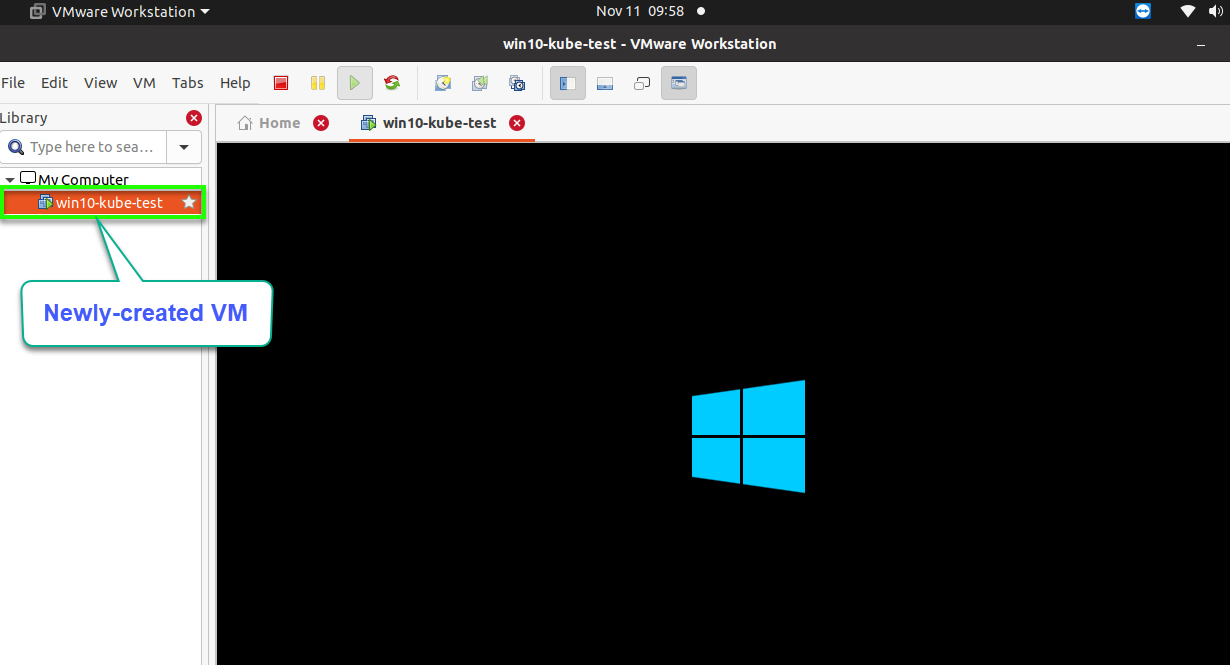
Running VM in VMware Workstation
Conclusion
Having a VM is having a perfect testing environment, whether for new or old software. And in this tutorial, you learned how to perform a VMware Ubuntu install and create your first VM in VMware Workstation Pro.
You are now one step away from mastering Linux virtualization. Now, why not explore more of the VMware Workstation? Perhaps install the VMware Tools? This tool suite enhances the performance of your VM.
Related:Install VMware Tools on Ubuntu and Increase VM Performance