Remote System Access With Ubuntu Screen Sharing via Vino VNC
Remoting into a system is a prevalent task for system administrators, and the Ubuntu screen sharing feature might just be what you need. Regardless of the number of machines you manage, connecting to your systems remotely saves you time and frustration.
With the Ubuntu screen sharing feature, you can securely establish remote connections. There are many ways to set up remote access. But in this tutorial, you will focus on using Ubuntu’s built-in screen-sharing feature via VNC.
Read on and start remotely accessing your machine anywhere!
Prerequisite
This tutorial comprises hands-on demonstrations. To follow along, you will need the following:
- An Ubuntu desktop system with a GUI (graphical user interface) – This tutorial uses Ubuntu 20.04 with the GNOME desktop, but any modern Ubuntu release should work fine.
- A Windows 10 and an Ubuntu system to act as the clients.
Related:How to Install Ubuntu 20.04 [Step-by-Step]
Installing the Vino Package
The Vino VNC server handles screen sharing in Ubuntu by default. But you still have to make sure you have the latest version installed.
Log in to your Ubuntu machine, open a terminal, and run the below apt update command to update your package manager indexes.
sudo apt update -y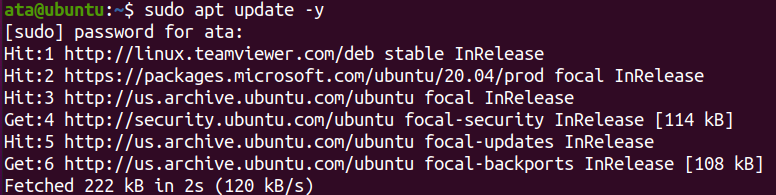
Updating your package manager indexes
Now, run the following apt install command to install vino on your machine.
sudo apt install vino -y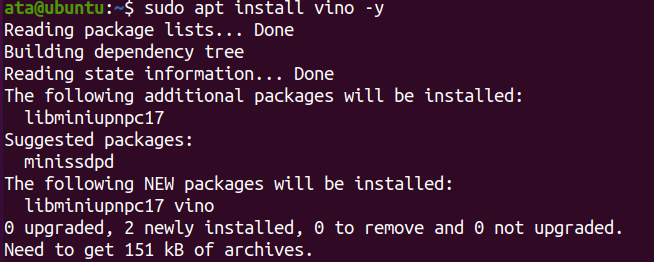
Installing vino Ubuntu screen sharing
Related:Learning Ubuntu Apt Get Through Examples
Enabling the Ubuntu Screen Sharing in GNOME Desktop
You have successfully installed the Vino package on your machine, but screen sharing is disabled by default. Before using screen sharing, you must enable it from the GNOME Desktop settings.
1. Open the Settings app on your GNOME desktop.
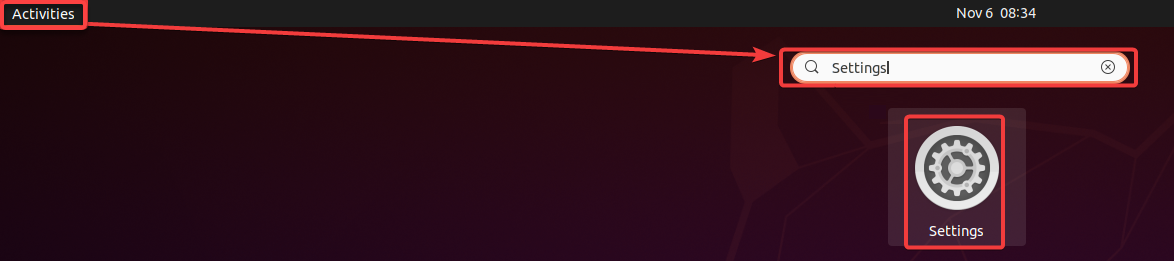
Opening the GNOME Settings application
- Next, configure screen sharing with the following:
- Navigate to Sharing (left panel), and click the toggle button (top-right) to enable the Sharing feature.
- Input your preferred name for your computer in the Computer Name field. This computer name is what other users will see when they connect to your Ubuntu machine.
- Click Screen Sharing, which opens the screen sharing options window (step three).
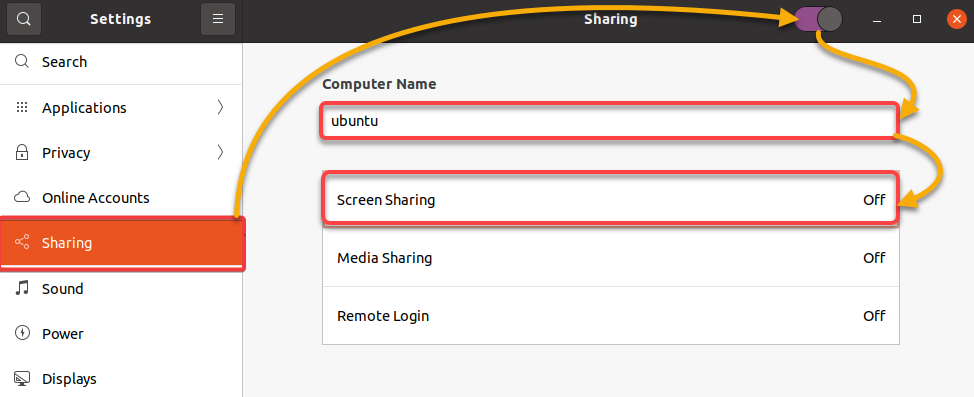
Enabling screen sharing
- Configure the screen sharing options as follows:
- Tick the Allow connections to control the screen checkbox.
- Select the Required a password option and enter a strong password in the Password field, which adds an extra layer of security to your system. As a result, users must enter the correct password before connecting to your Ubuntu machine. If you select the New connection must ask for access option instead, a pop-up window will appear on your screen whenever another user tries to connect. You can then either accept or reject the connection attempt.
- Select your preferred network connection under Networks, and close the pop-up window.
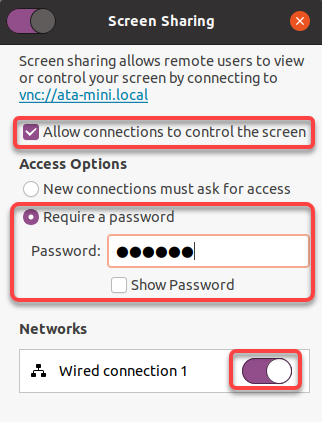
Configuring screen sharing
4. Now, click on Media Sharing and Remote Login to turn them on.
These options allow you to share music and video with other devices on your local network and enable SSH connections from remote machines.
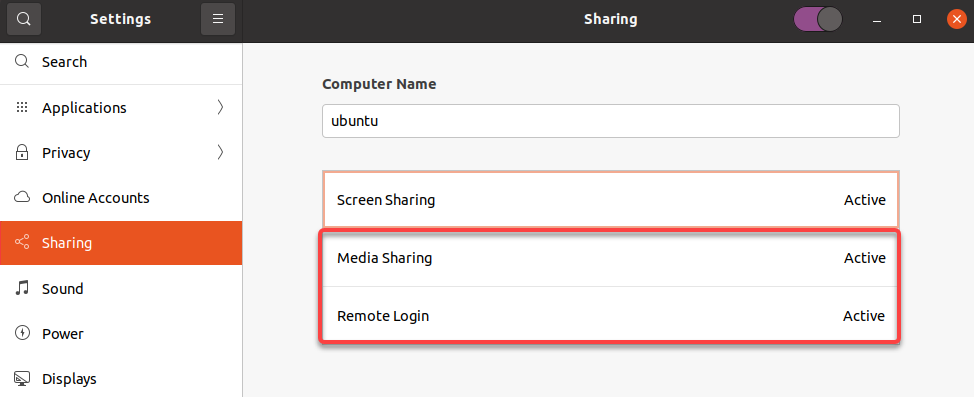
Enabling Media Sharing and Remote Login
5. Lastly, run the below command to see your IP address.
hostname -INote down your IP address assigned to your Ubuntu machine, like in the screenshot below. You will need this IP address to your machine from another system.
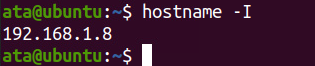
Finding the IP address
Installing a VNC Client on Windows
After enabling screen sharing on your Ubuntu machine, you are almost ready to connect to it from another system. Yes, almost. You first have to install a VNC client on your Windows machine.
The most popular VNC client for Windows is VNC® Viewer (free for personal use), which you will use to connect to your Ubuntu desktop.
To install the VNC® Viewer on Windows:
1. Open your favorite web browser, and visit the VNC Viewer download page.
2. Next, select Windows as your Desktop, and click Download VNC Viewer to download the installer for Windows.
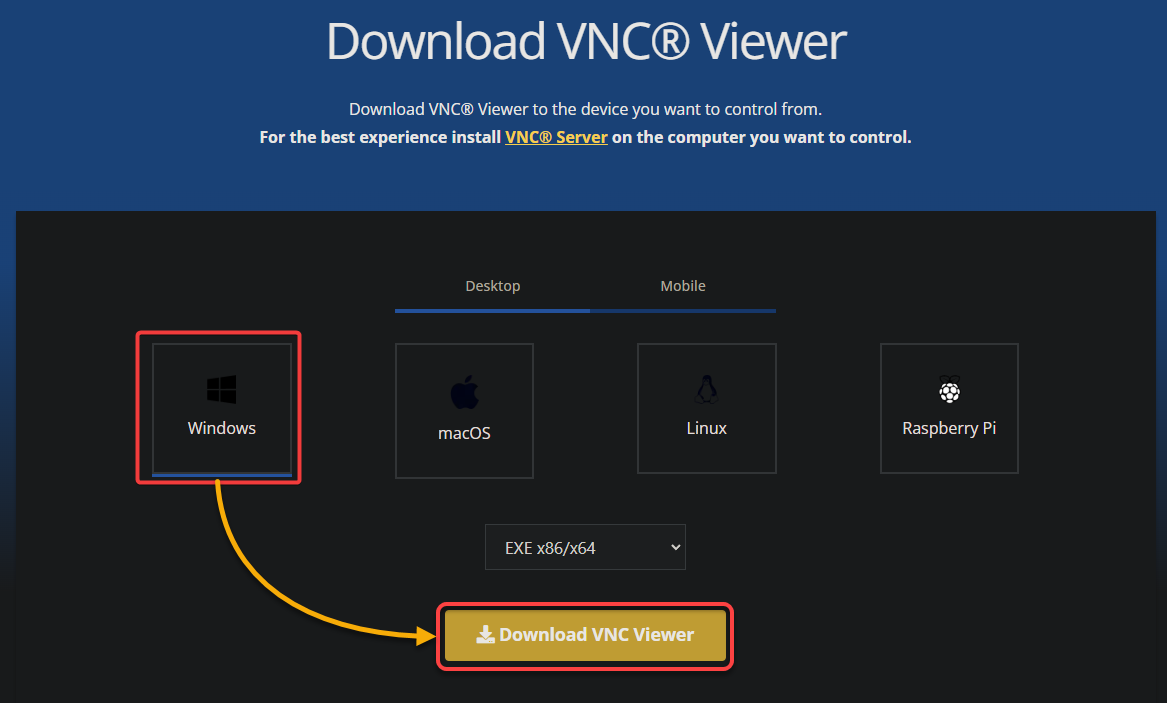
Downloading VNC Viewer’s installer for Windows
3. Once downloaded, double-click the package to launch the setup wizard.
4. Now, click Next since it is just a welcome screen.
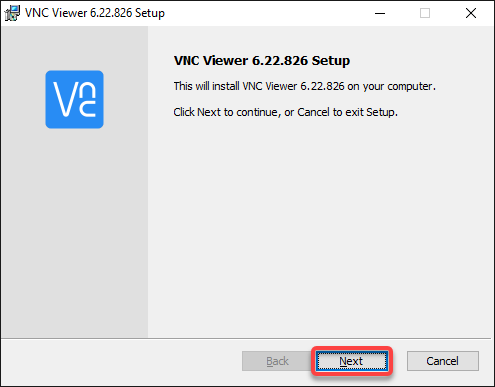
Moving past the welcome screen
5. Tick the checkbox at the bottom, and click Next to accept the End-User License Agreement (EULA).
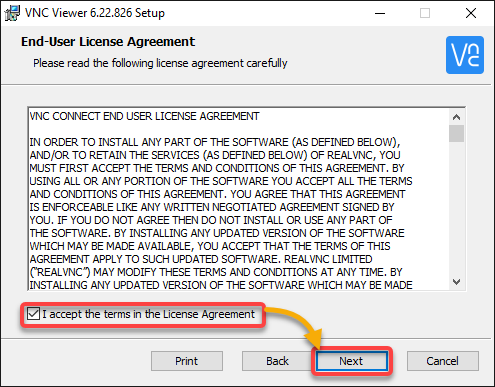
Accepting the license agreement
6. Next, keep the default settings of how the features are installed and click Next.
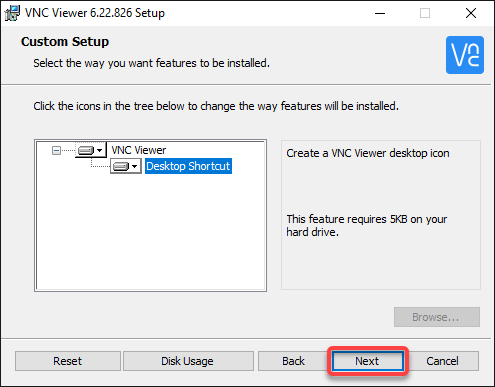
Keeping the features installation default settings
7. Click Install to start the installation process.
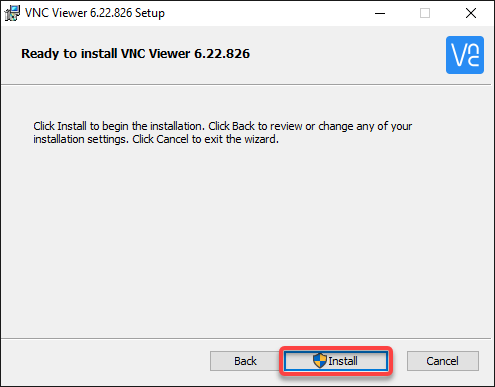
Installing the VNC Viewer
8. Lastly, once installed, click Finish to close the installer. At this point, VNC Viewer has been installed and is ready to use.
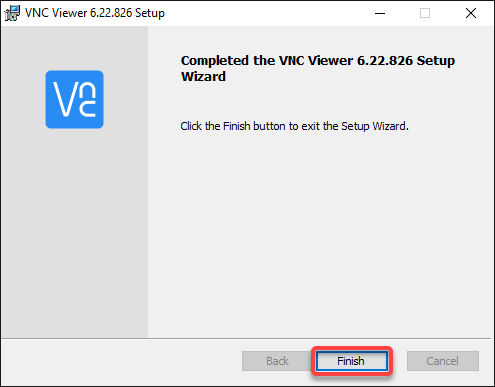
Finishing the installation
Remoting an Ubuntu Desktop from Windows
With the VNC client installed, you are finally at the most exciting part of this tutorial. You remotely access your Ubuntu desktop from your Windows machine via the VNC Viewer.
To remotely access your Ubuntu desktop:
1. Launch the VNC Viewer from the Start menu.
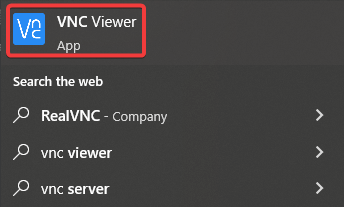
Launching the VNC Viewer
2. Once VNC Viewer is up, provide your Ubuntu machine’s IP address you noted in the “Enabling Ubuntu Screen Sharing in GNOME Desktop” section, and press Enter.
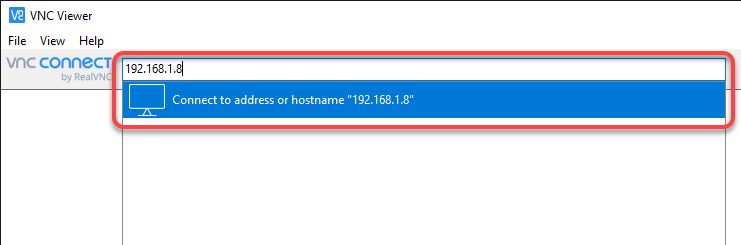
Providing the remote machine’s (Ubuntu) IP address
3. Click Continue on the security warning that appears, as shown below.
This warning prompts because the connection is not encrypted. But typically, you would want to set up an SSH tunnel in a production environment and encrypt the connection.
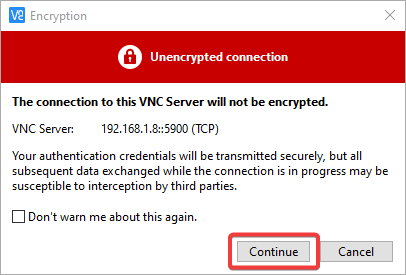
Continuing with an unencrypted connection
4. Finally, enter the password you set up for screen sharing and click OK.
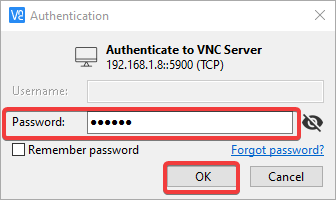
Authenticating connection
If successful, you will now be connected to your Ubuntu machine, as shown below. This output confirms your Ubuntu screen sharing is working correctly.
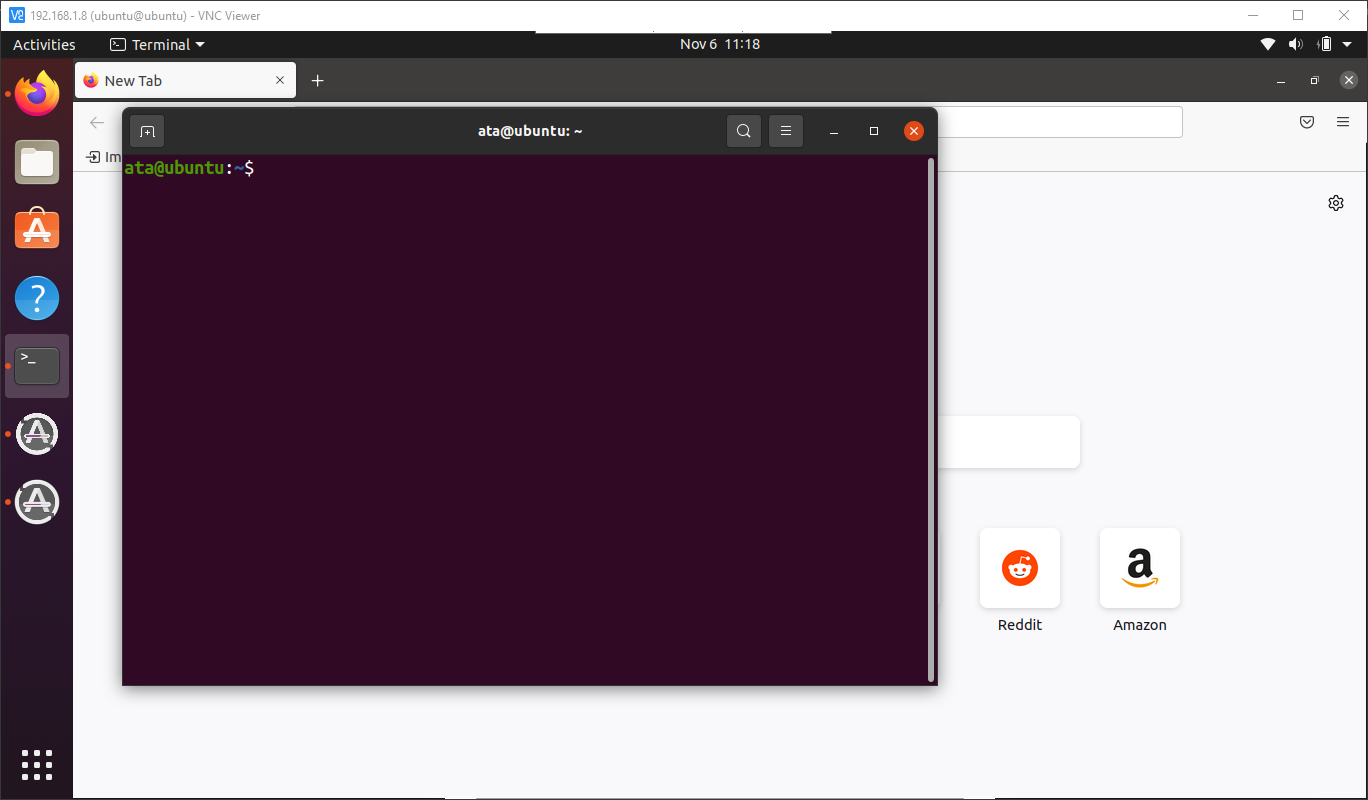
Remoting an Ubuntu desktop
Remoting an Ubuntu Desktop from Another Linux Machine
If you can remotely access your Ubuntu desktop from Windows, you can also connect from another Linux machine. But first, similarly, you must install a remote desktop client (Vinagre) on your Ubuntu client machine.
Vinagre is a remote desktop client for the GNOME desktop environment that provides GUI for connecting to remote systems using VNC, RDP, and SSH.
1. Log in to your Ubuntu client machine, open a terminal, and run the below command to install vinagre on your Ubuntu client machine.
sudo apt install vinagre -y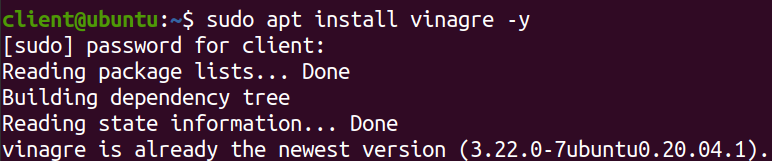
Installing Vinagre on the Ubuntu client machine
2. Once installed, launch Vinagre from the Activities menu.
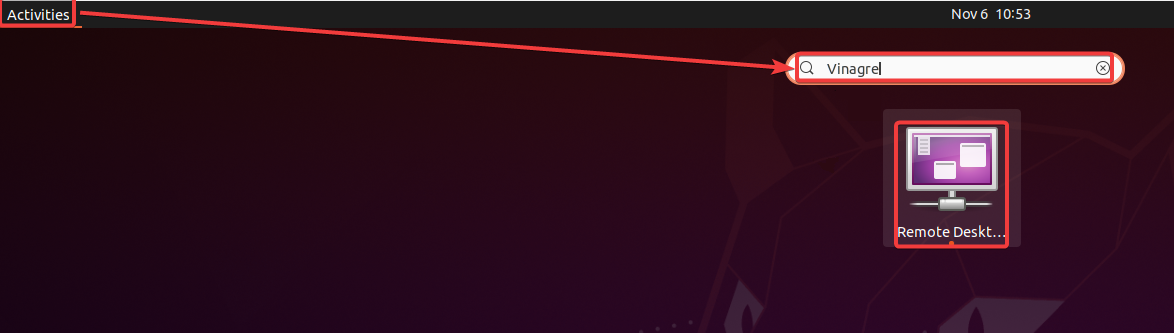
Launching Vinagre
3. Click Connect (top-left) to initiate creating a new remote connection.
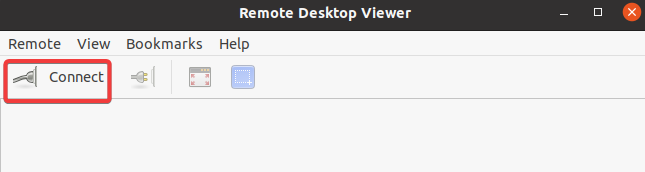
Initiating creating a new remote connection
4. Now, configure the new remote desktop connection with the following:
-
Select VNC from the Protocol drop-down list.
-
Enter the IP address of your Ubuntu machine.
-
Keep other settings as is, and click Connect to establish the connection.
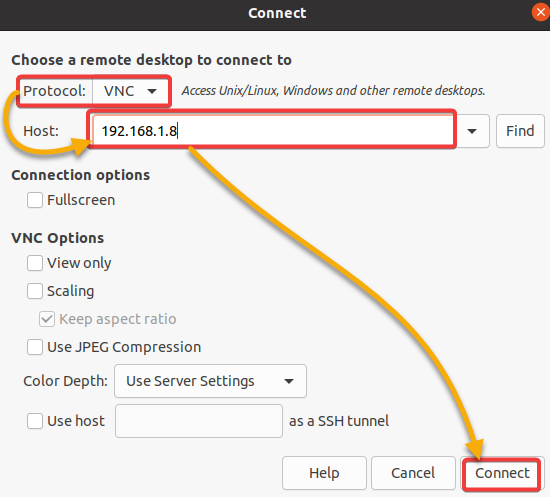
Configuring a new remote desktop connection
5. Provide the screen sharing password, and click Authenticate to authenticate the connection.
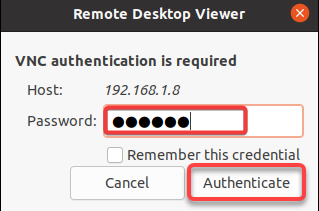
Authenticating the VNC connection
If all goes well, you will now be connected to your Ubuntu machine’s GNOME desktop, as shown below.
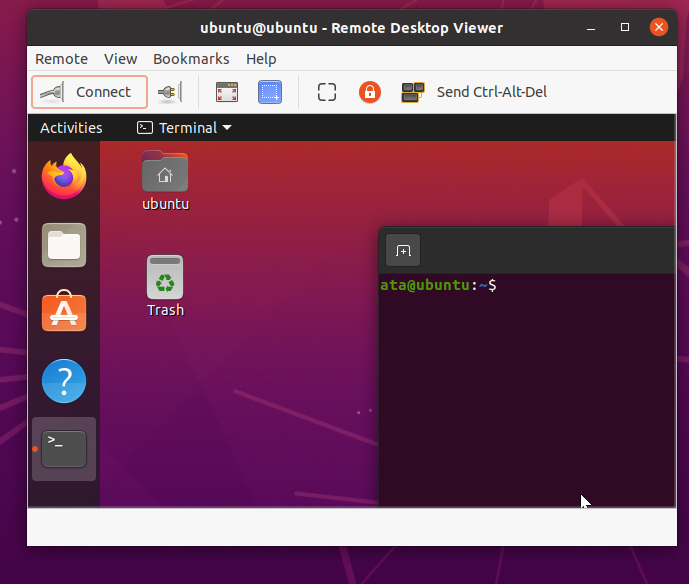
Connecting to an Ubuntu machine from another Ubuntu client machine
Conclusion
Remoting into your Ubuntu desktop can be a convenient way to access your files and applications from another system. Moreover, providing remote support is also just a few clicks away.
In this tutorial, you learned how to enable screen sharing on Ubuntu and remotely access your desktop from Windows and another Linux machine.
With this newfound knowledge, you can ditch using third-party tools like TeamViewer. Take advantage of the built-in screen-sharing feature in Ubuntu to remotely access your desktop!