
How to Install Eclipse IDE on Linux
Eclipse is a popular Integrated Development Environment (IDE) that offers a ton of features. But installing Eclipse can be quite the challenge – especially on Linux.
This guide aims to simplify that task by providing clear and concise instructions on how to install Eclipse IDE in Ubuntu.
By the end of this guide, you should have a working installation of Eclipse that you can use to develop your applications.
Prerequisites
This hands-on tutorial requires you to have the following items so that you may follow along with the examples seamlessly.
- A Linux computer with a desktop environment. This tutorial will use Ubuntu 20.04.
Related:How to Install Ubuntu 20.04 [Step-by-Step]
-
Your Linux computer must have Java installed. This tutorial will be using OpenJDK 11.0.15.
-
You must have access to the root account or an account with sudo privileges. This guide uses a root account to execute commands.
Related:Secure Linux With the Sudoers File
Installing Eclipse on Linux
The Eclipse package is not available in the Ubuntu package repository as of this writing, which means you cannot install Eclipse via apt or the Software Manager. Don’t worry; there are several ways to install the Eclipse IDE.
How to Install Eclipse IDE from the Snap Store (Terminal)
Eclipse is available in the Snap Store, so you can install it with the snap command. If you’re unfamiliar with Snap, it’s a package manager for Linux that allows you to install and update applications with a single command.
Snaps are convenient to install and update. They are safe to run and isolated from the rest of your system, so they don’t put your system at risk.
While Snap is an excellent app source, the Eclipse version available in the Snap store might not be the latest one.
1. First, open a terminal window on your computer and run the below command to confirm that Snap is installed.
snap versionIf Snap is available on your system, you will see the version information in the result.
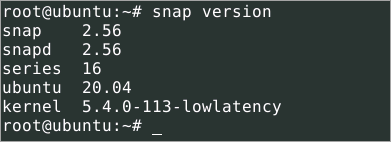
Checking the Snap version
2. If Snap is not installed, run the below command to install.
apt install snapd -y
Installing Snap
3. Create a symbolic link between /var/lib/snapd/snap and /snap. Doing so gives Snap apps access to your home directory after the installation.
ln -s /var/lib/snapd/snap /snap4. Now, update the Snap package list by running the below command.
snap refresh
Updating the Snap package list
5. Run the following command to install the latest stable version of Eclipse. This command downloads the latest stable version of Eclipse from the Snap store and installs it on your system.
snap install --classic eclipseThe output below shows that you have successfully installed Eclipse IDE from the Snap store. The version number may be different depending on when you installed it. In this example, the Eclipse version from Snap is 2019-12 at the time of writing.

Snap is 2019-12

Installing the latest stable version of Eclipse.
6. At this point, you have successfully installed Eclipse IDE from the Snap store. To launch Eclipse, click on the Activities tab in the top left corner of your screen and search for Eclipse.
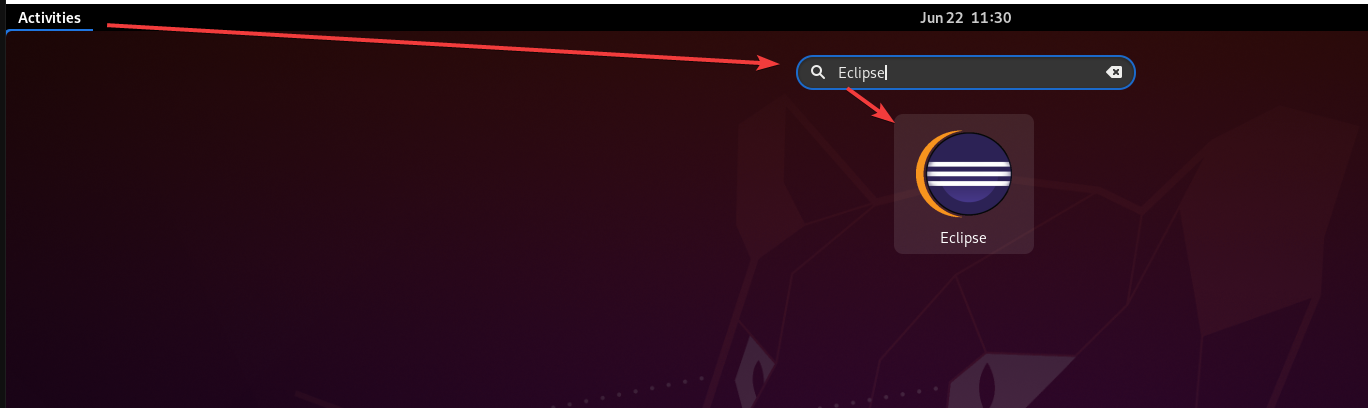
Launching the Eclipse IDE
How to Install Eclipse IDE using the Eclipse Installer
If you want the latest and greatest, install the official package from the Eclipse website. The version available on the official Eclipse website is always the latest one.
Compared with the Snap installation method, installing the official package requires more steps. But don’t worry. This section will walk you through the installation process step by step.
To install Eclipse from the official Eclipse website, follow these steps.
1. Open the Eclipse download website using your web browser.
2. Click the appropriate download link for Linux, as shown below. By default, the browser will download the file to your Downloads folder (~/Downloads).
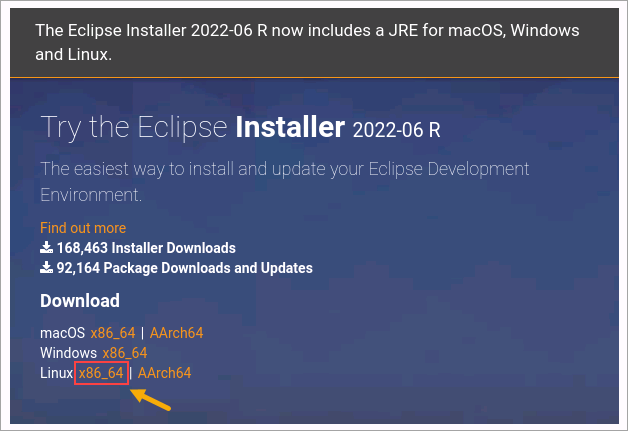
Downloading the Eclipse package
3. Extract the downloaded archive file using the commands below. These commands extract the contents of the package to the /opt directory.
You can choose any location you want to extract the file. But /opt is a common directory for optional software packages, so it’s a good choice.
The -xvzf options tell tar to (x) extract the (f) file through (z) gzip and display the progress (v).
cd /opt
tar -xvzf ~/Downloads/eclipse-inst-jre-linux64.tar.gz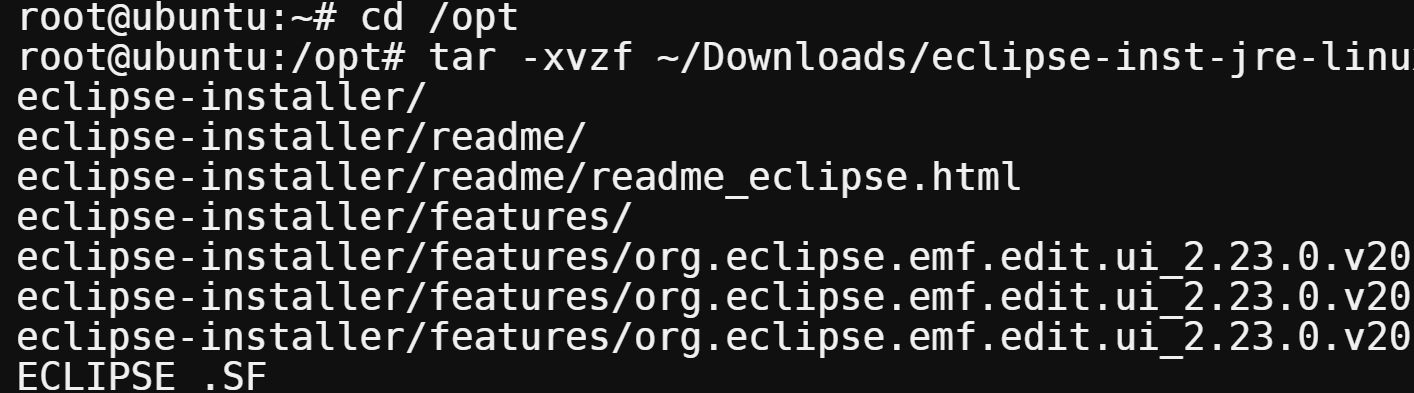
Extract the downloaded archive
4. The installer extracts to the eclipse-installer subdirectory_._ To confirm the sub directory exists, run the below command.
ls -a
See the extracted eclipse-inst
5. Change the working directory to the eclipse-installer subdirectory.
cd eclipse-inst6. Now that you are in the eclipse-installer directory, run the ./eclipse-inst file to launch the installer.
./eclipse-inst7. On the Eclipse installer window, click the Eclipse IDE type you wish to install. This example installs the Eclipse IDE for Java Developers.
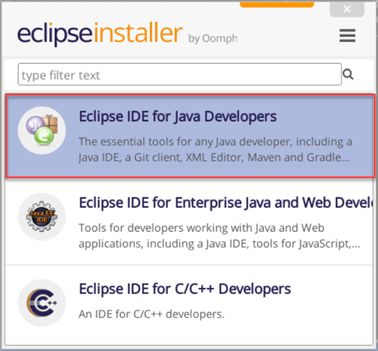
Selecting the installation type
8. Select your Java version and the installation directory on the next screen. The default Java version and installation directory are acceptable in most cases.
Tick the two checkboxes to launch Eclipse using the start menu and the desktop icon. Click the Install button to start the installation process.
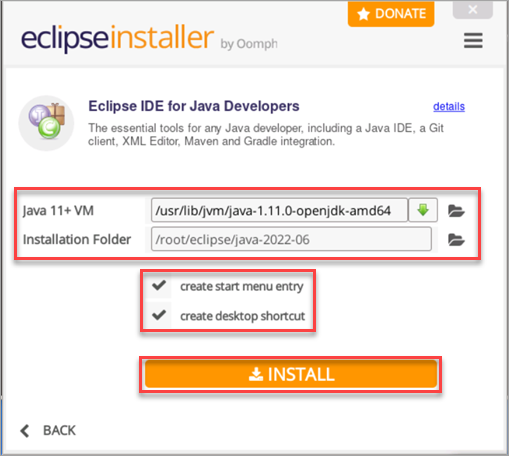
Configuring the installation options
9. Next, click Accept Now on the Eclipse Foundation Software User Agreement page.
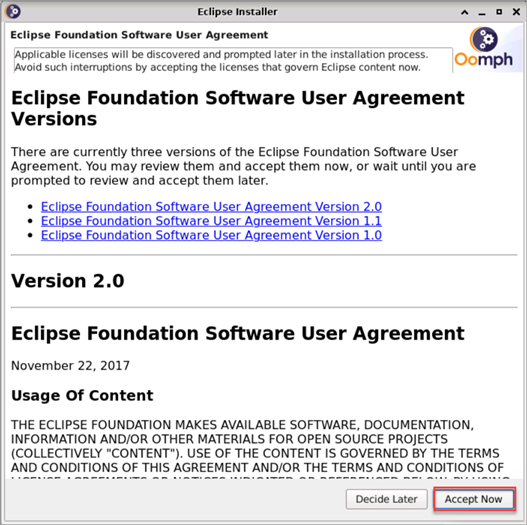
Accepting the Software User Agreement
10. Review the Licenses and click Accept to proceed.
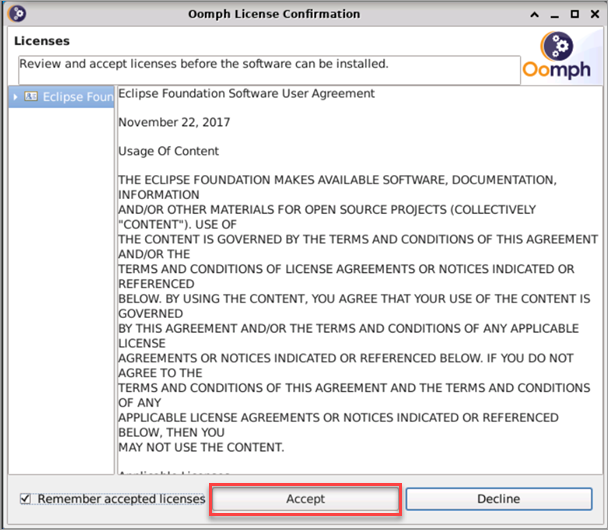
Accepting the Licenses
The status changes to Installing.
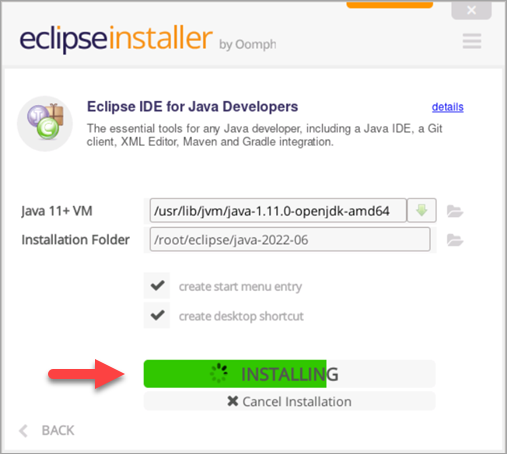
Eclipse IDE installation in progress
11. After the installation, click the exit button and No to exit the installer.
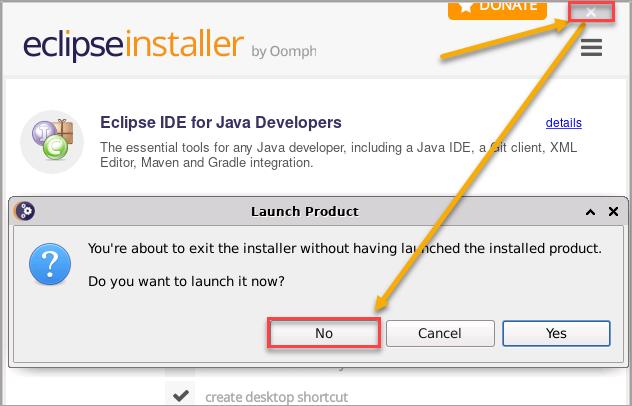
Closing the Eclipse installer
Starting Eclipse
You’ve completed learning how to install Eclipse IDE. Depending on which installation method you used, there are a few ways to start the Eclipse IDE.
From the Terminal
If you installed Eclipse through the Snap Store, one way to start the Eclipse IDE is by running the below command in the terminal.
Note: This method does not apply if you installed Eclipse IDE using the Eclipse installer.
eclipse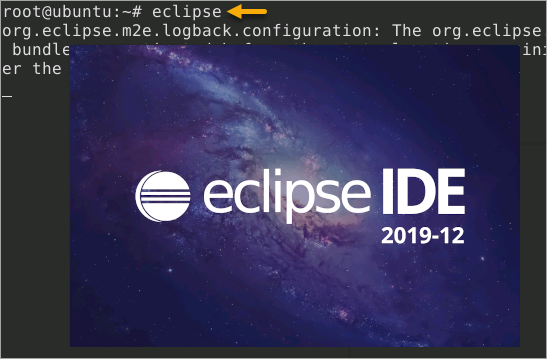
Starting Eclipse IDE from the terminal
From the Application Finder
Most Linux desktop environments have a search or application finder that allows you to search for an application and launch it.
For example, in Ubuntu GNOME, click the Activities menu and type “eclipse” to search for the Eclipse IDE.
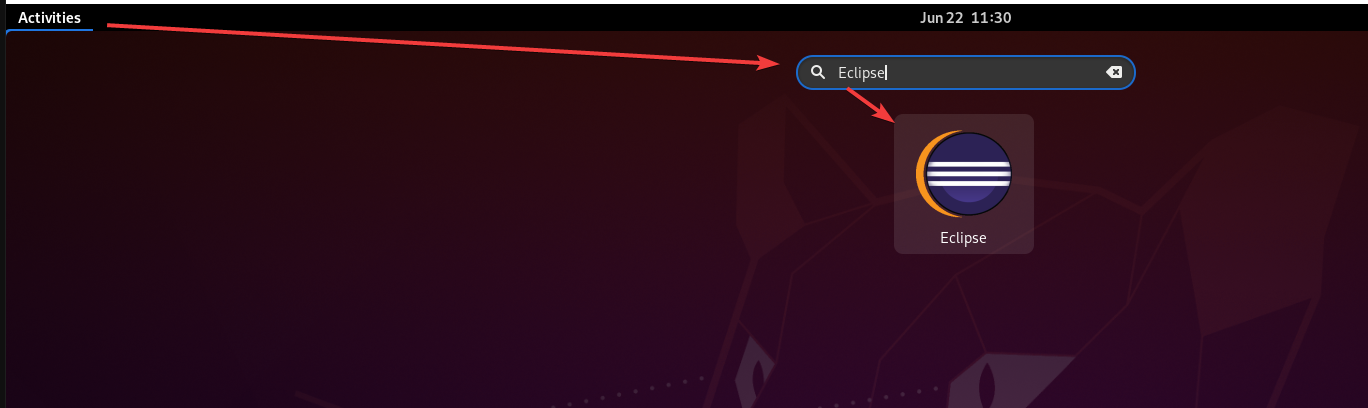
Starting Eclipse IDE from the Activities search
Another example on the XFCE desktop, click the Application Finder icon on the dock. Type “eclipse” in this search bar to find the Eclipse IDE app and click Launch.
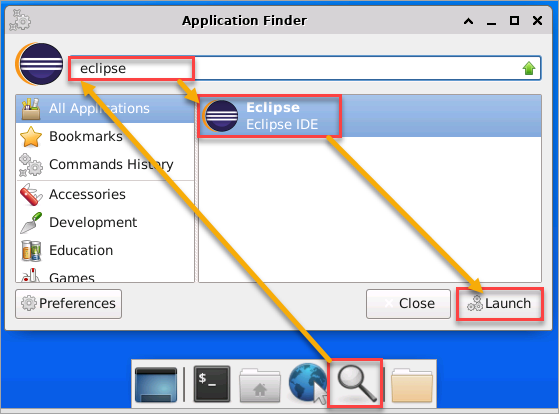
Starting Eclipse IDE from the Application Finder
From the Desktop Shortcut
If you installed Eclipse IDE using the Eclipse installer, the installer automatically creates a desktop shortcut for you. All you need to do is double-click the icon to launch the Eclipse IDE.
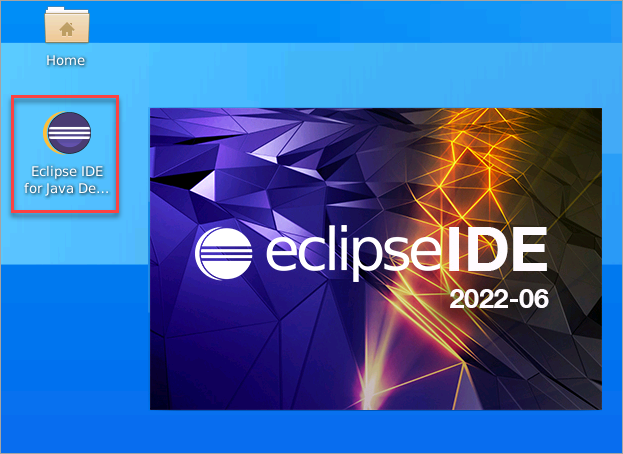
Starting Eclipse IDE from the Desktop shortcut
The Eclipse IDE Launcher asks you to specify the workspace directory. Choose the default location or browse to a different one as you wish. This workspace will store all your project files, including the preferences. Once you’ve selected the workspace location, click the Launch button.
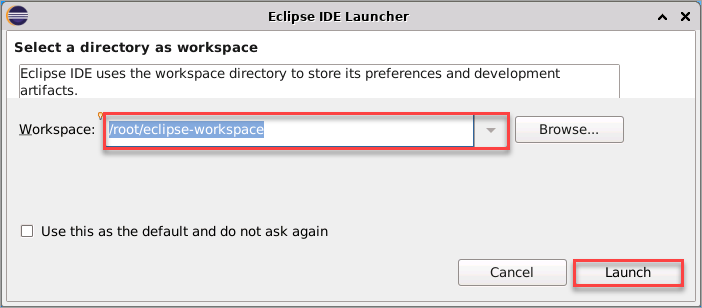
Selecting the workspace location
Eclipse will now launch with your selected workspace. You will see the welcome screen when Eclipse launches successfully, as shown below. You can now start using Eclipse.
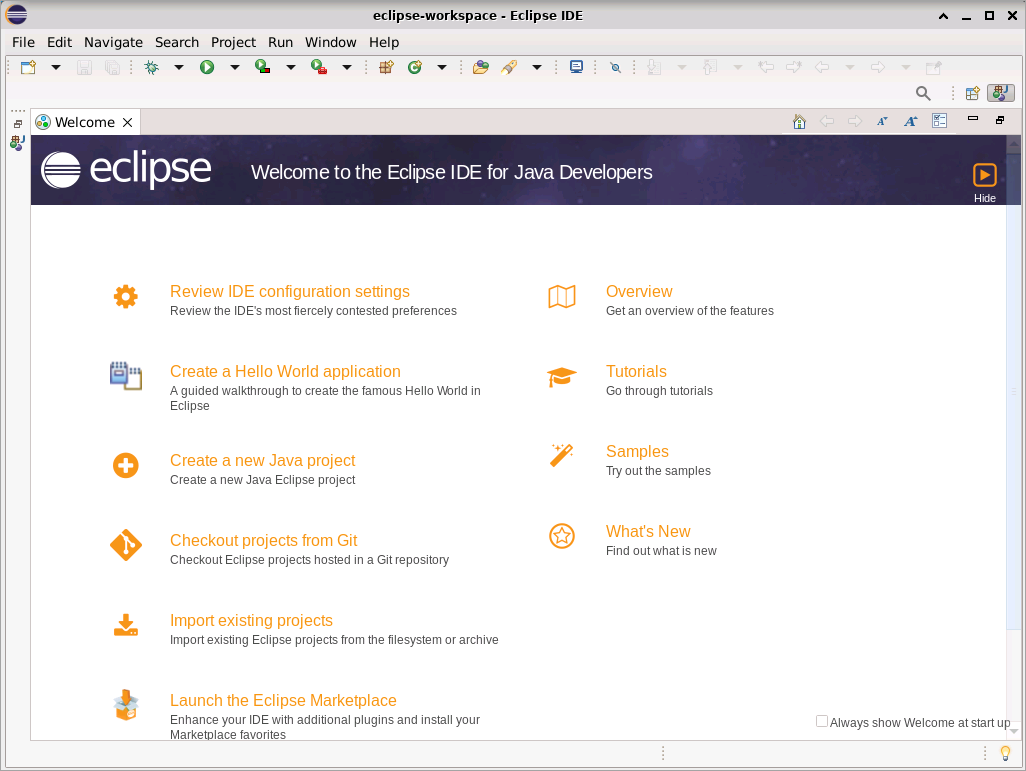
Eclipse IDE’s first launch
Conclusion
A popular IDE for Java development, Eclipse comes packed with features to help make your life as a developer easier. In this guide, you have learned the different methods to install Eclipse on Linux and how to launch it.
Are you looking to extend the Eclipse IDE features? The Google App market is a great place to start looking for plugins to add to your Eclipse installation. With over 1000 plugins available, you will find something that will help your development workflow.
Have you used Eclipse before? What are some of your favorite features? Let us know in the comments below!