
Automating Site Deployments with Caddy Web Server
Web servers have been the backbone of the internet, delivering content to users worldwide. But then again, security has always been a top concern in this process. Fear not, as the Caddy web server has got your back, armed and secure from the get-go.
In this tutorial, you will journey into the heart of the Caddy web server and learn the ins and outs of site deployments.
Ready? Let Caddy automate your site deployments and embrace a hassle-free, secure web-serving experience!
Prerequisites
Before jumping into automating site deployments with Caddy, ensure you have the following in place:
- An Ubuntu server to run Caddy – This tutorial uses an Ubuntu 22.04LTS, but other distros work.
Related:Install Ubuntu Server 20.04: A Step-by-Step Walkthrough
- A non-root user with sudo privileges.
💡 This tutorial uses the root account for running commands, which is not the best practice from a security standpoint. Switching to a non-root user with sudo privileges is preferable for executing similar actions on your system.
Related:How to Create a User on Ubuntu Linux in Multiple Ways
-
A domain name (i.e., mercyio.xyz) that points your domain’s A/AAAA DNS records to your server.
Installing the Caddy Web Server on Ubuntu
Imagine you have set up your system but still need the perfect tool to manage your site deployments effortlessly. Look no further than Caddy to serve your content flawlessly and automate various aspects of your deployment process.
To install Caddy on your Ubuntu system, you must obtain a Caddy binary and install Caddy as a system service as follows:
💡 Note: This installation is for Debian, Ubuntu, and Raspbian. If you are on a different distro, visit the official documentation for installing Caddy.
1. Open your terminal, then execute the following command to install the necessary components for managing packages in a Debian-based system.
This installation includes the following:
debian-keyring– Contains GnuPG archive keys for the Debian archive to verify Debian packages’ authenticity during installation or update.debian-archive-keyring– Contains the Debian archive keyring for package authentication and integrity verification.apt-transport-https– Provides support for securely downloading packages via HTTPS in APT.[curl](https://adamtheautomator.com/curl-linux/)– A command-line tool for transferring data with URLs that supports various protocols, including HTTP and HTTPS. This tool is used to download files from remote servers.
💡 If you use a non-root user, always prepend commands with
sudoif they require elevated privileges.
apt install -y debian-keyring debian-archive-keyring apt-transport-https curl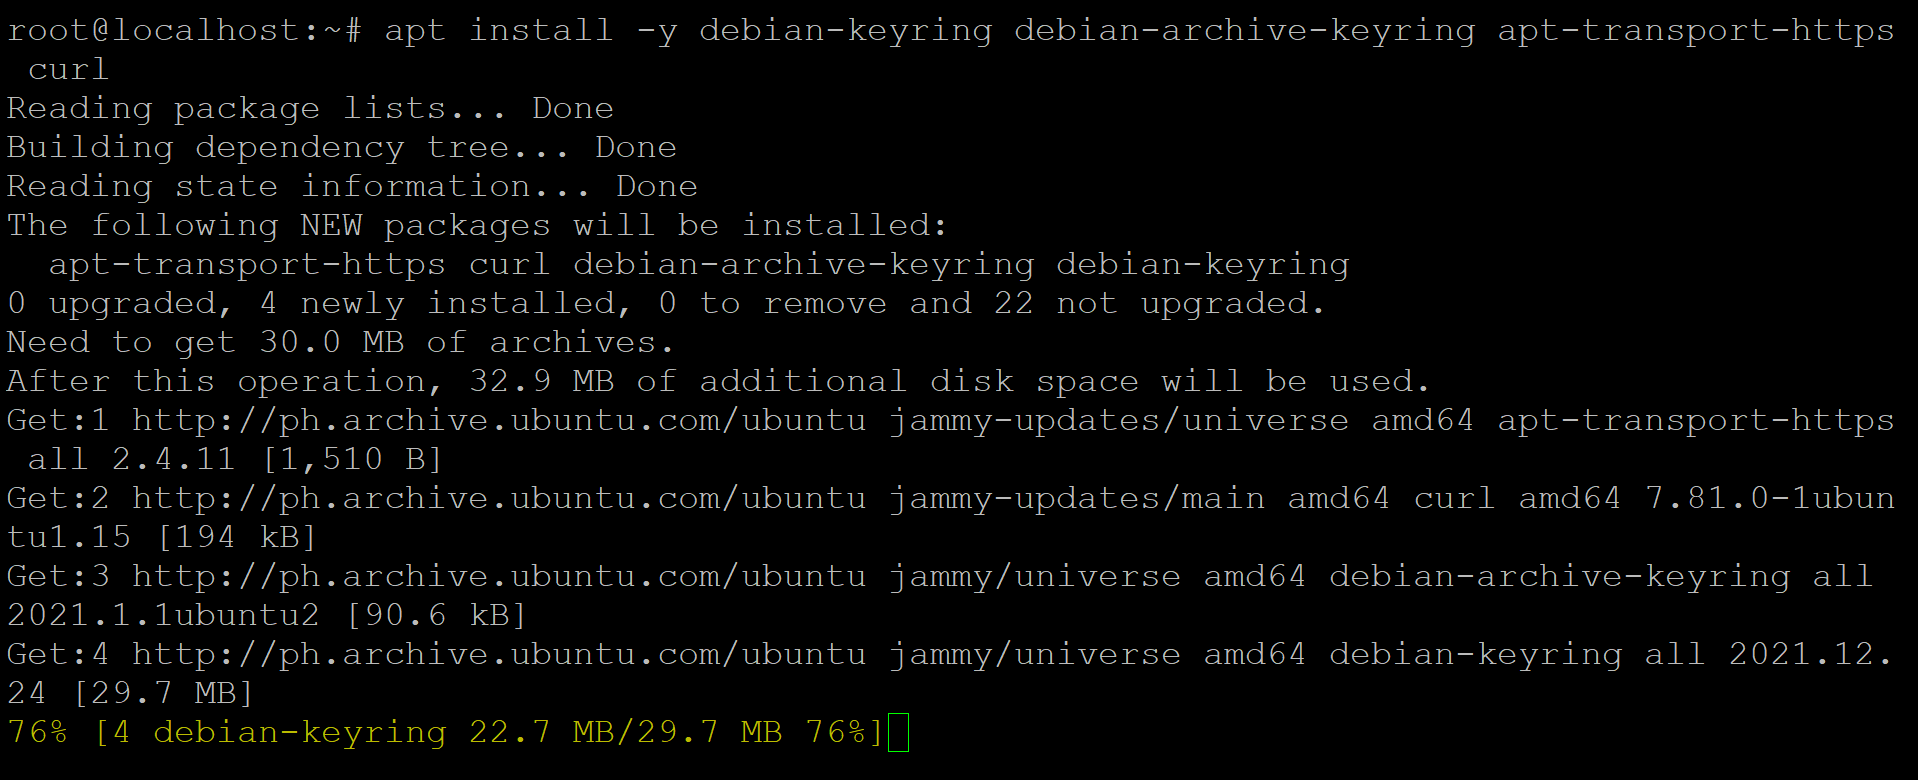
Installing necessary components for package management
2. After package installations, run the command below, which provides no output but performs the following:
- Fetch (
curl) the GPG key for the Caddy package repository. This GPG key verifies the authenticity of packages downloaded from the Caddy repository. - Converts the GPG key into a binary format and saves the binary to a specific file location.
curl -1sLf 'https://dl.cloudsmith.io/public/caddy/stable/gpg.key' \| gpg --dearmor -o /usr/share/keyrings/caddy-stable-archive-keyring.gpg3. Subsequently, run this command to achieve the following:
- Fetch (
curl) the content of a text file from a specified URL, which contains the information necessary for adding the Caddy package repository to your system’s APT sources.
This file inclusion allows users to install or update Caddy packages using the system’s package manager. - Write the fetched content to a file named
caddy-stable.listlocated in the/etc/apt/sources.list.d/directory.
curl -1sLf 'https://dl.cloudsmith.io/public/caddy/stable/debian.deb.txt' \| tee /etc/apt/sources.list.d/caddy-stable.list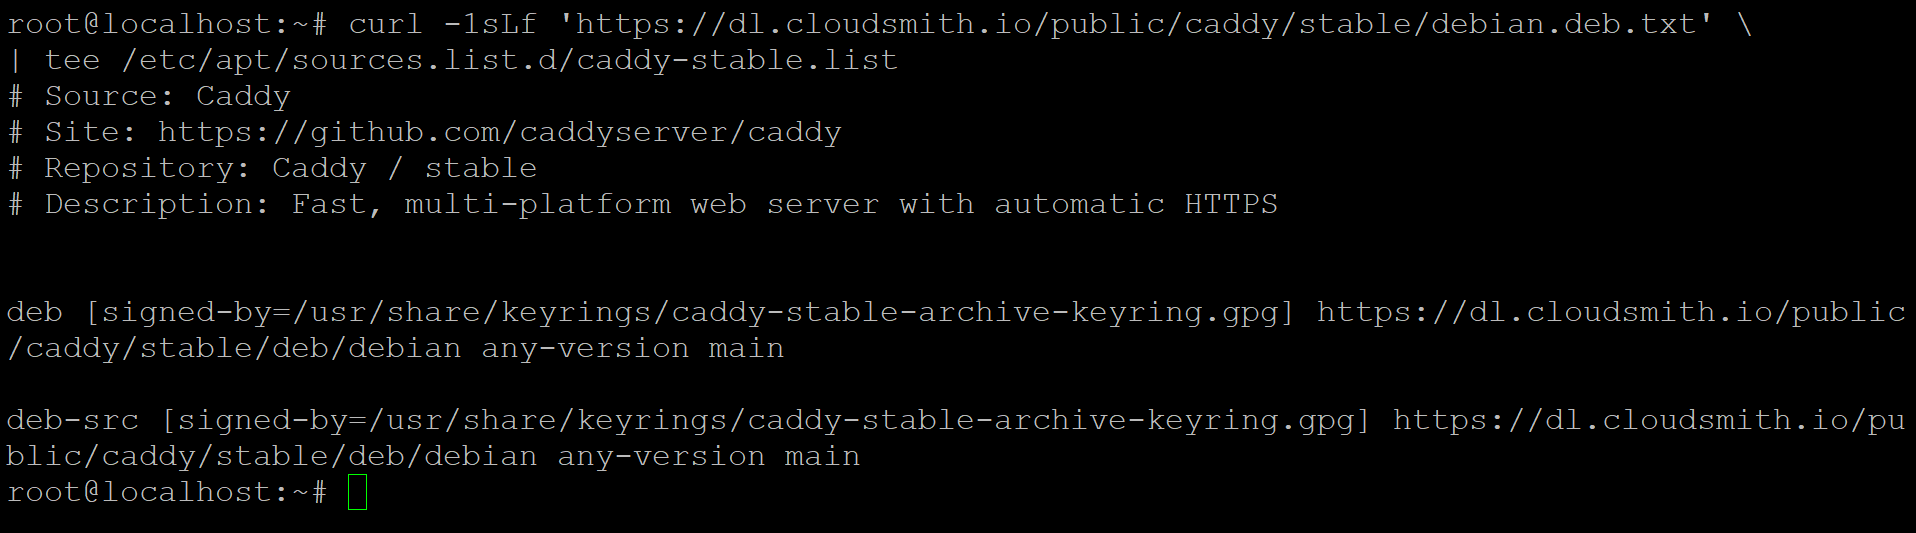
Fetching a file to allow installing or updating Caddy packages
4. Now, execute the following apt update command to ensure your system’s package lists are up-to-date.
apt updateRelated:Ubuntu Apt Get Mastery: A Guide with Practical Examples
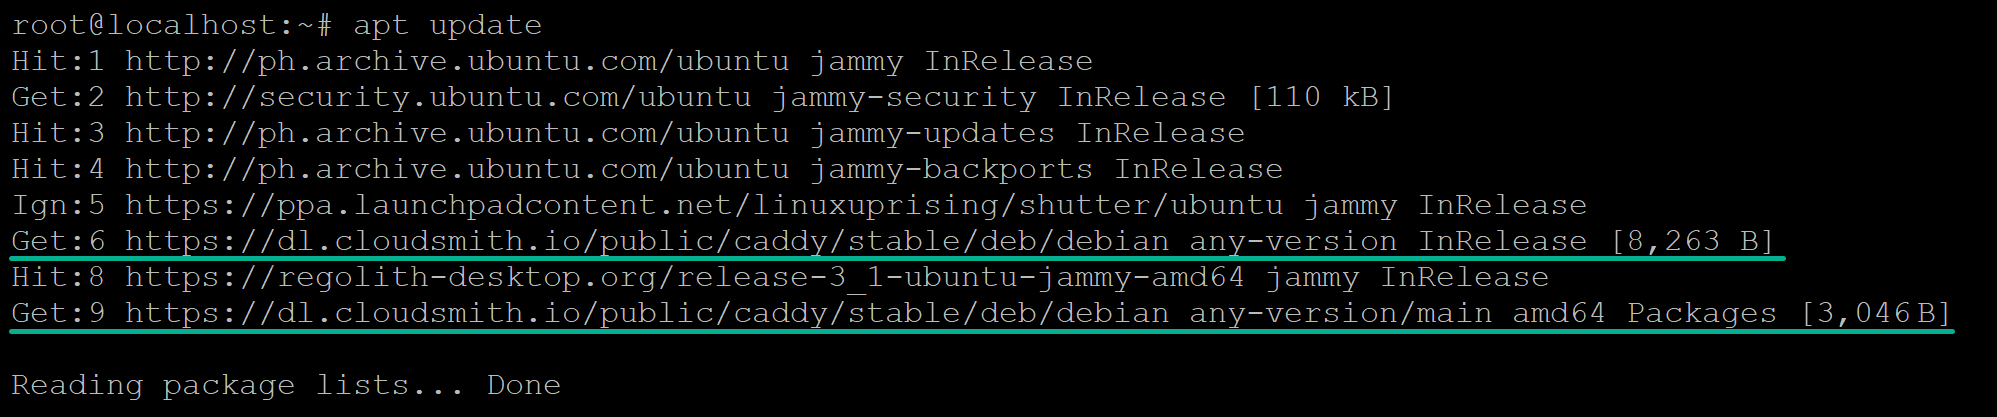
Updating the system’s package list
5. Once updated, run the command below to install the caddy web server package on your system and check the installed version.
apt install caddycaddy versionAs of this writing, the latest version is v2.7.6; yours might be different.
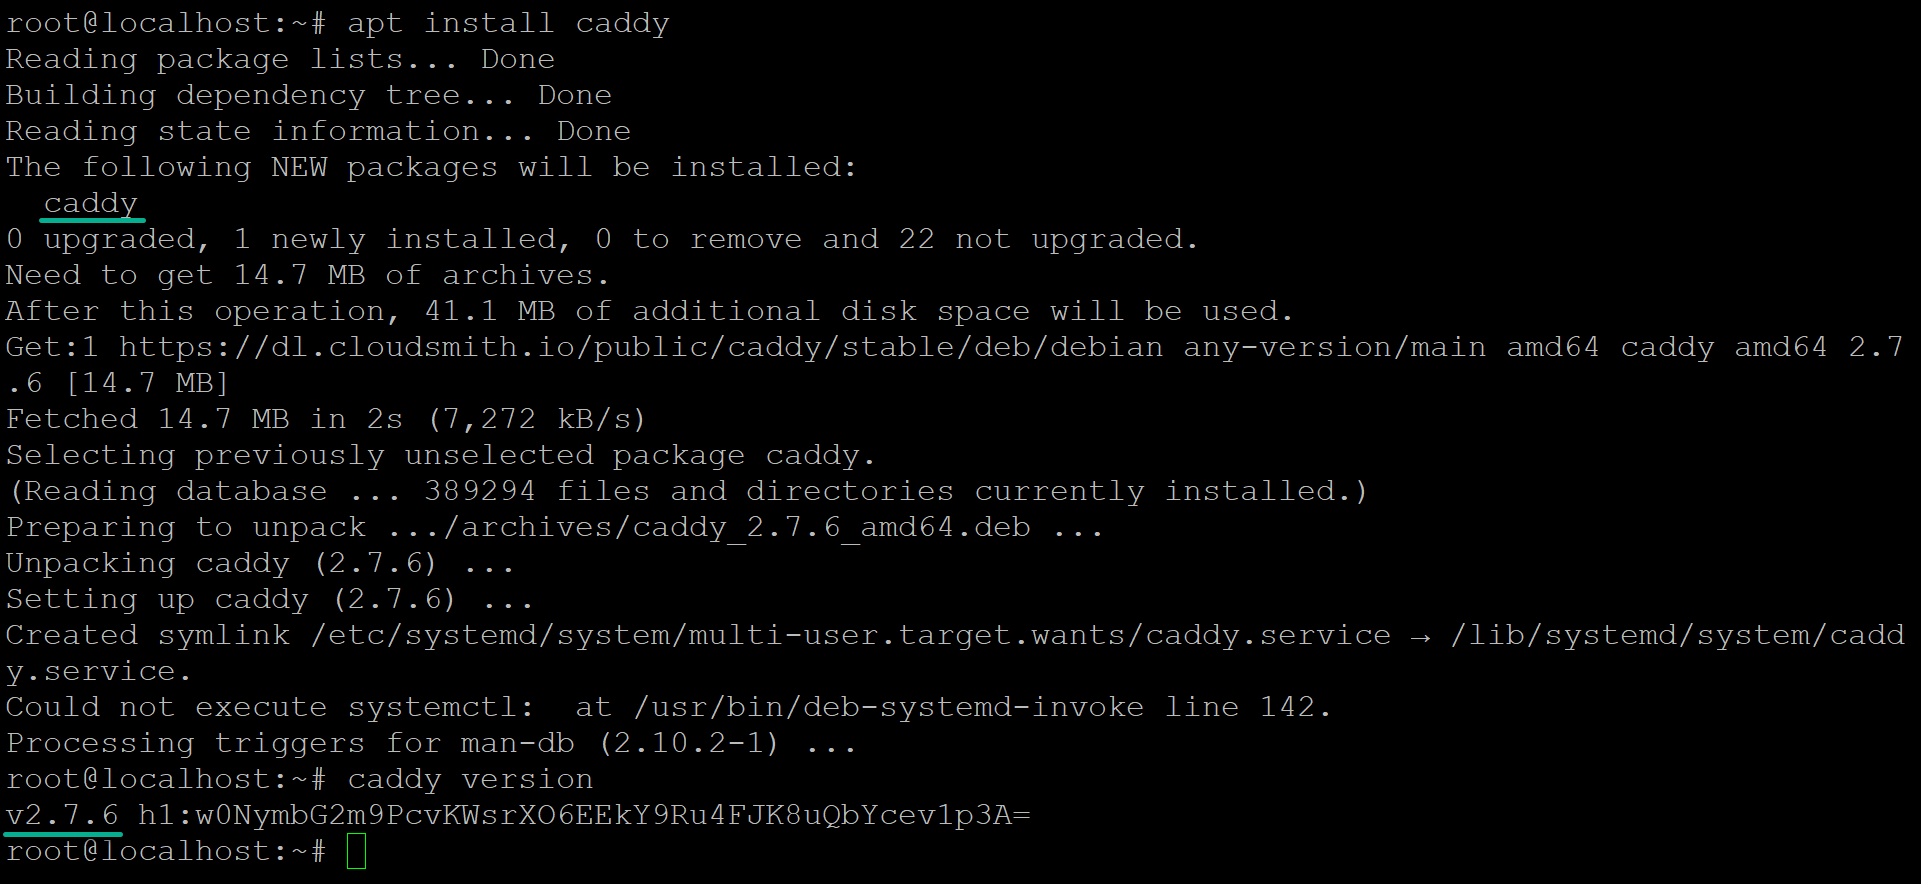
Installing the Caddy web server package and checking the installed version
6. Invoke the following systemctl command to verify the status of the caddy web server.
systemctl status caddyIf you have successfully installed Caddy, it starts and becomes active, and you will see the following output.
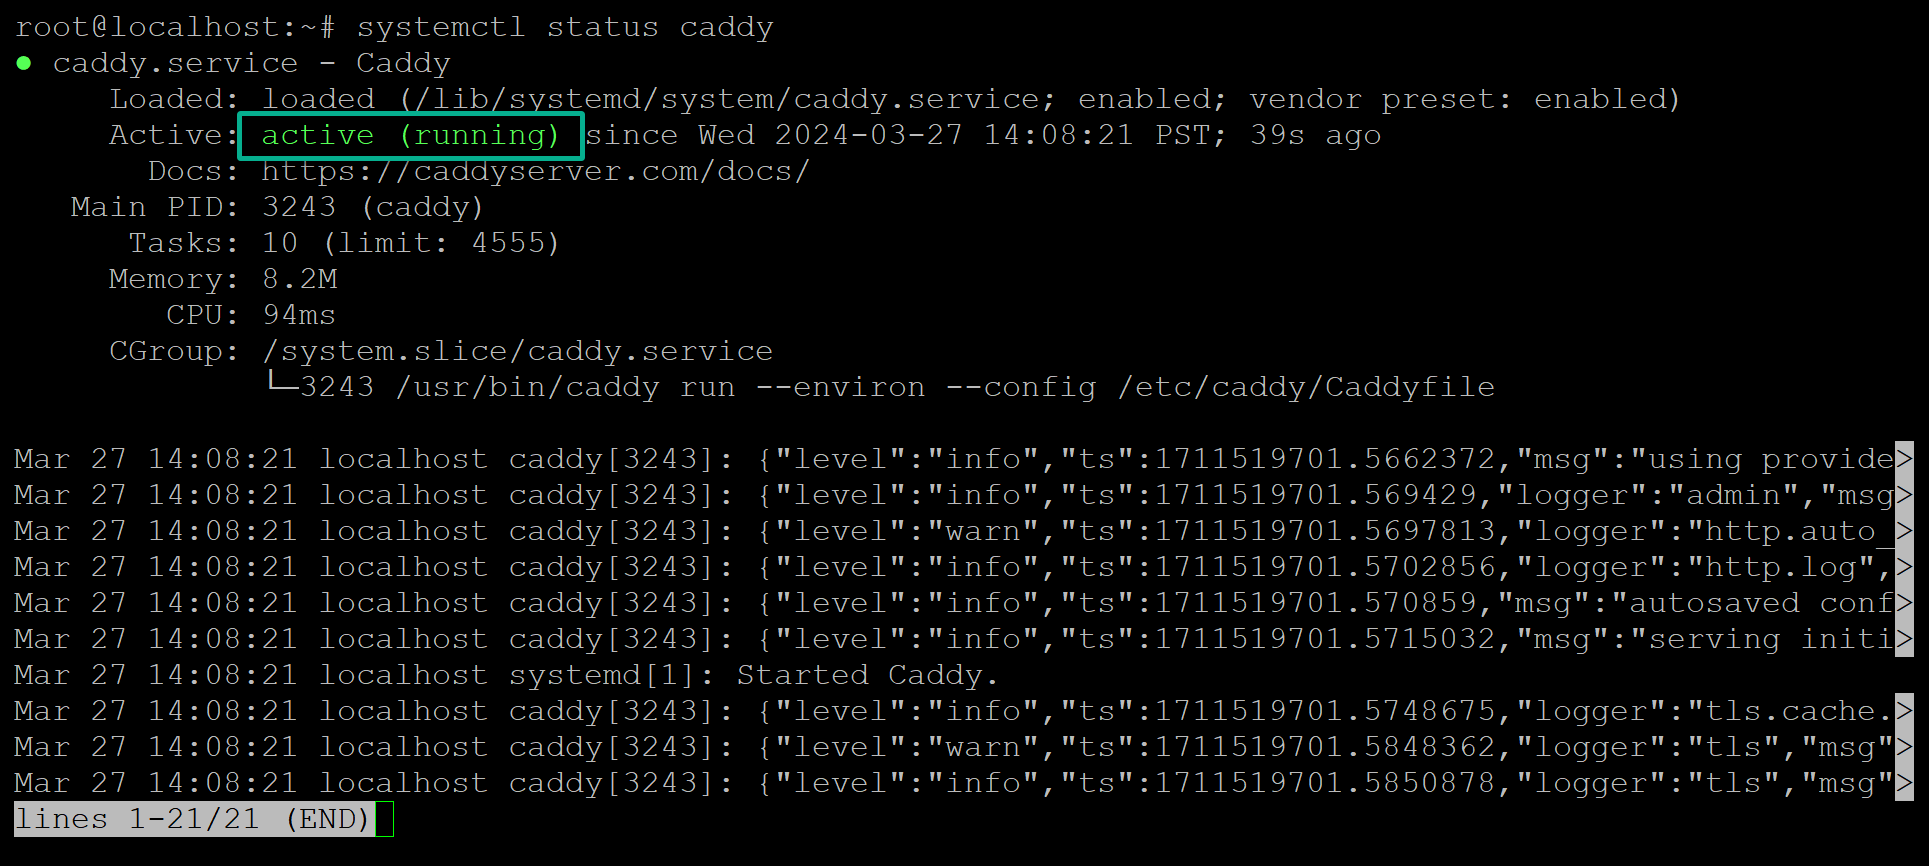
Verifying the Caddy web server status
Related:Correct Way of Using Ubuntu systemctl to Control Systemd
7. Lastly, open your favorite web browser and visit your server address, followed by port 80 (i.e., 172.x.x.x:80) to access the Caddy welcome page.
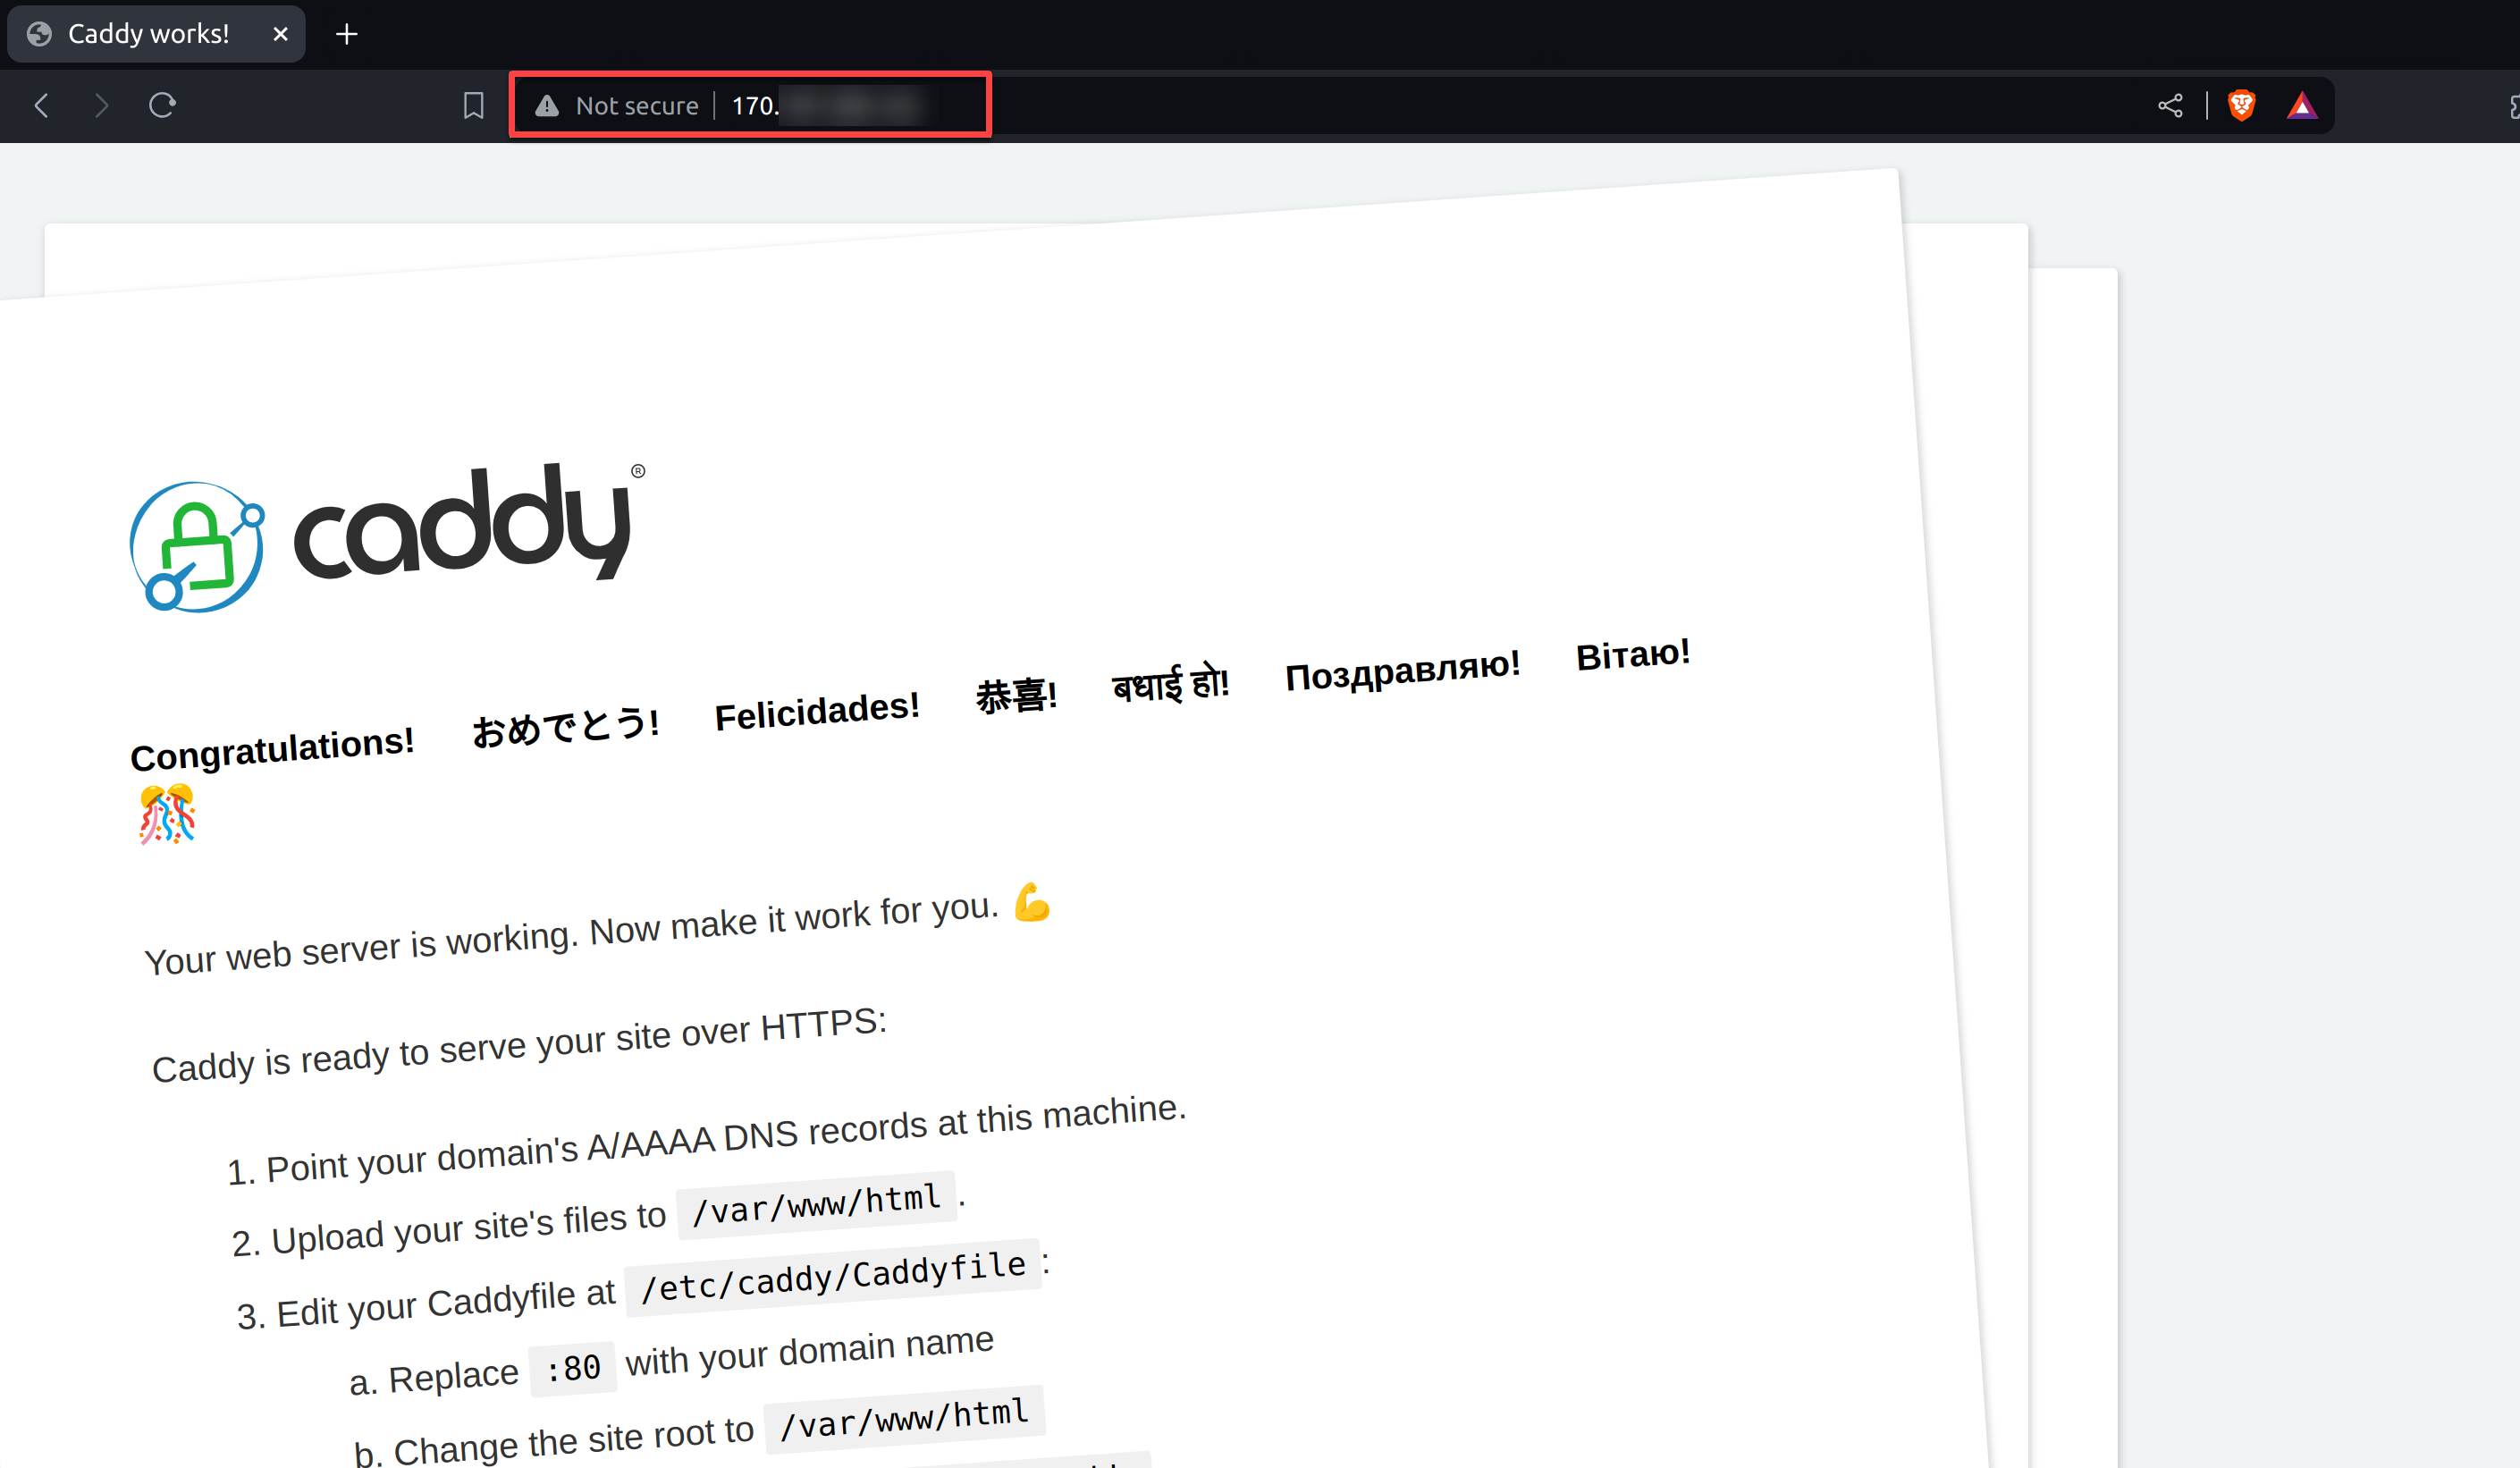
Accessing the Caddy web page
Serving Up a Static HTML File
With your Caddy server up, you must lay the groundwork for hosting your website or web application efficiently, ensuring Caddy can serve a static HTML file.
To make Caddy serve up a static HTML file, follow these steps:
1. Open the /etc/caddy/Caddyfile with your preferred editor (i.e., nano or [vim](https://adamtheautomator.com/vim-for-linux/)).
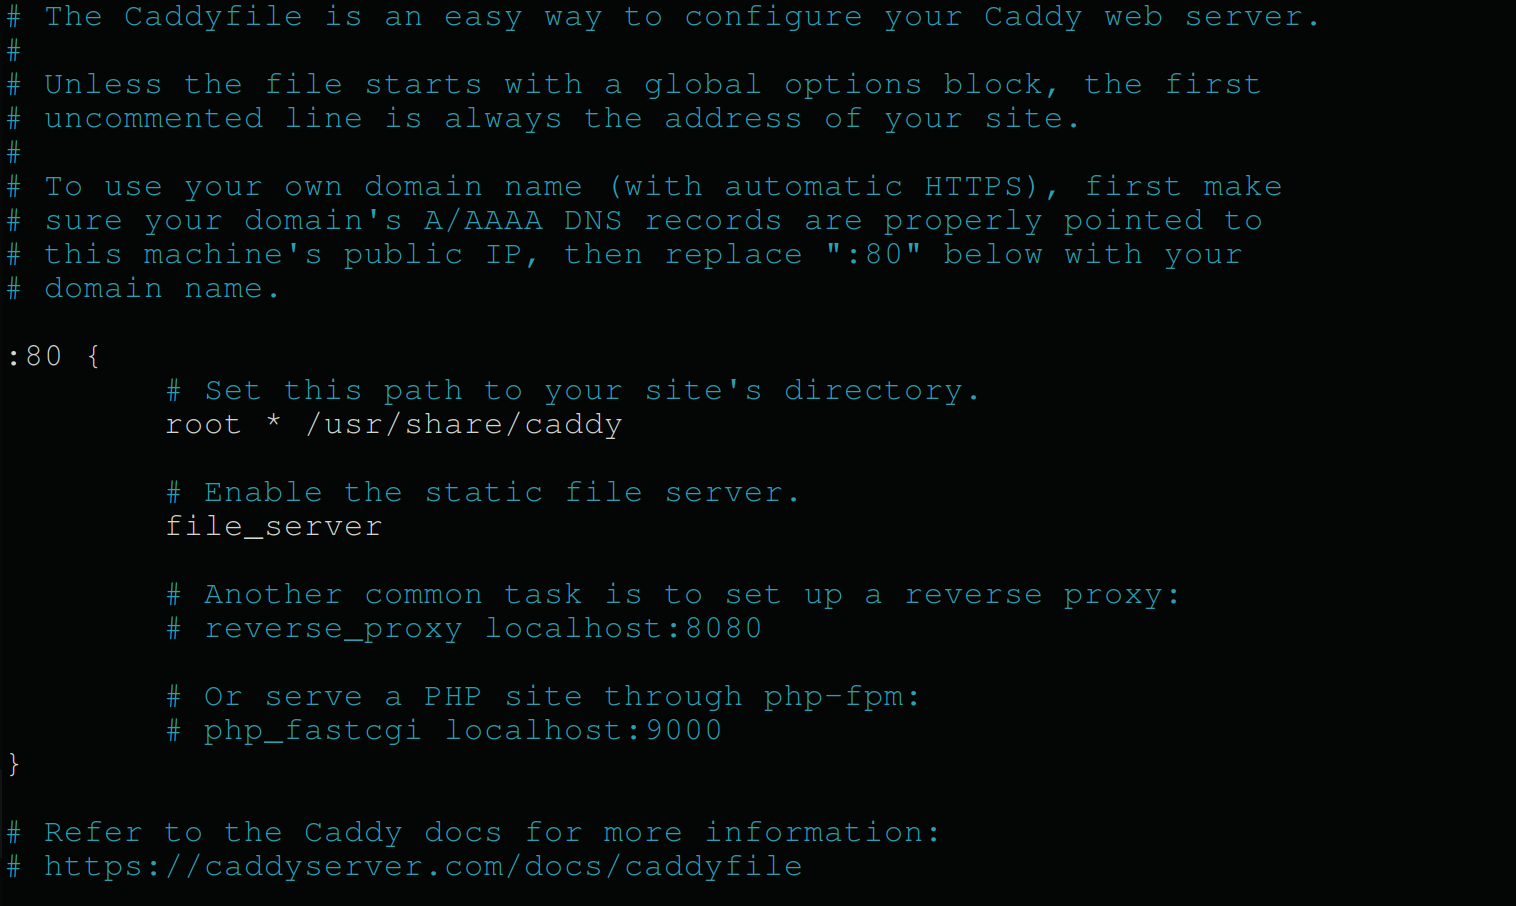
Opening the Caddyfile
Related:How to Get Started With Gedit Linux
2. Next, delete and replace all contents of the file with the following lines, replacing domain.com with your domain name.
This configuration tells Caddy to serve out static files found in the /var/www/html directory when someone visits your specified domain (domain.com).
# Replace this with your domain namedomain.com # Set the root directory for serving files to /var/www/htmlroot * /var/www/html# Enable the file server functionalityfile_server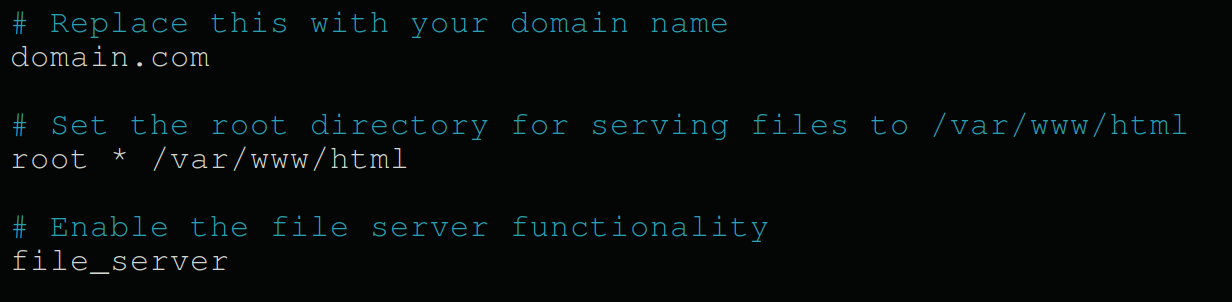
Editing the Caddyfile to serve a static HTML file
3. Afterward, run each command below to establish a directory where your website’s files will be stored.
# Create the directory /var/www/html if it doesn't exist alreadymkdir -p /var/www/html# Navigate to the /var/www/html directorycd /var/www/html# Create an empty index.html file (your homepage)touch index.html4. Open the index.html file within the /var/www/html directory and replace the content with the following code for ctote a basic webpage.
Modify the content as you like; this file will be your domain’s default page.
<!DOCTYPE html><html lang='en'><head> <meta charset='UTF-8'> <meta name='viewport' content='width=device-width, initial-scale=1.0'> <title>Welcome to My Site</title></head><body> <header> <h1>Hello from Caddy Server!</h1> </header> <main> <p>Welcome to my website. This static page is served by Caddy.</p> </main> <footer> <p>© $(date +%Y) <add your name here></p> </footer></body></html>5. Now, execute one of the commands below to restart the Caddy server and apply your configuration changes.
If successful, both commands do not produce output to the terminal, but you will verify the changes in the following step.
# Restart the Caddy service using systemctlsudo systemctl restart caddy# Reload the Caddy configuration without stopping the servicecaddy reload6. Ultimately, visit your domain name on your browser, and you will see the homepage you created, as shown below.
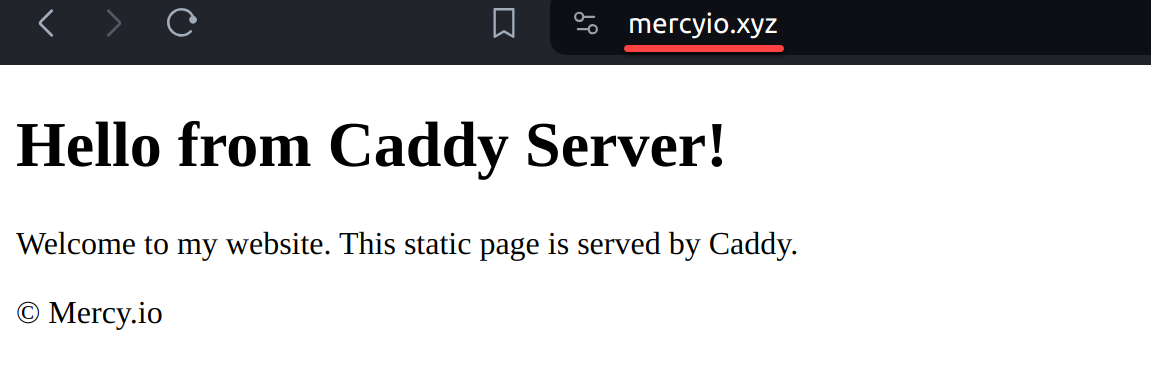
Verifying the domain is accessible via a web browser
Notice that your domain is also secure, thanks to Caddy!
Caddy automatically manages SSL/TLS certificates for your domains using Let’s Encrypt. This feature ensures all traffic proxied through Caddy is encrypted, enhancing security and privacy.
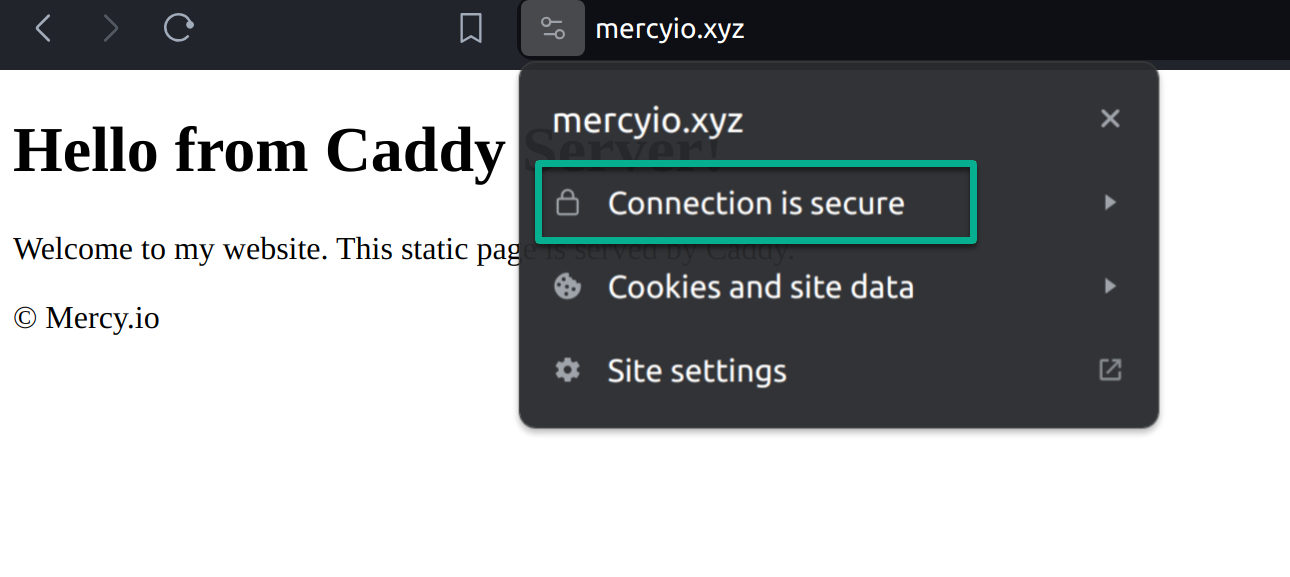
Verifying the domain is secure
Transforming Caddy as a Reverse Proxy
You have seen how Caddy serves a static HTML file, but Caddy is beyond a mere web server. Imagine having multiple services running on different ports or servers—managing them individually becomes a hassle.
With Caddy’s reverse proxy capabilities, you can streamline your setup, consolidate your services under one domain, and ensure they all benefit from Caddy’s automatic HTTPS encryption. These services could be a web application in Flask, Node.js, or any other framework.
To transform Caddy as a reverse proxy, carry out the following:
1. Create a file called app.py and add the following code snippets that sets up a simple Flask application that responds with Hello when accessed at the root URL (/).
This application also provides the flexibility to specify the port number via the FLASK_PORT environment variable when running the application. The port defaults to 3000 if the variable is not set.
from flask import Flask# Create an instance of the Flask classapp = Flask(__name__)# Define a route for the root URL ("/") and associated view function@app.route("/")def hello(): # Return the string "Hello" as the response return "Hello"# Check if the script is being run directlyif __name__ == "__main__": import os # Read the value of the FLASK_PORT environment variable # Convert it to an integer, defaulting to 3000 if not set port = int(os.environ.get("FLASK_PORT", 3000)) # Start the Flask development server # Listen on all available network interfaces (0.0.0.0) on the specified port app.run(host='0.0.0.0', port=port)2. Next, run the following command to set the FLASK_PORT environment variable to specify the port number 4000, and run the Flask application.
export FLASK_PORT=4000python3 app.py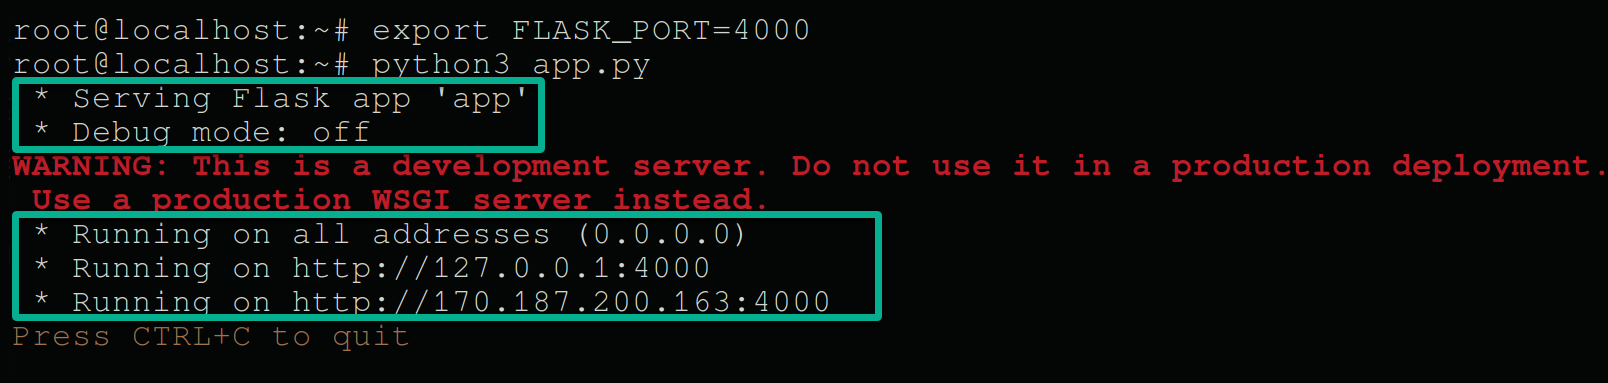
Running the Flask application
3. Now, visit your server address followed by port 4000 (i.e., 172.x.x.x:4000) to access your Flask application.

Accessing the Flask application
4. Open the /etc/caddy/Caddyfile with your editor and add the following line to include a reverse proxy directive that points to your Flask application.
reverse_proxy / <server-ip>:4000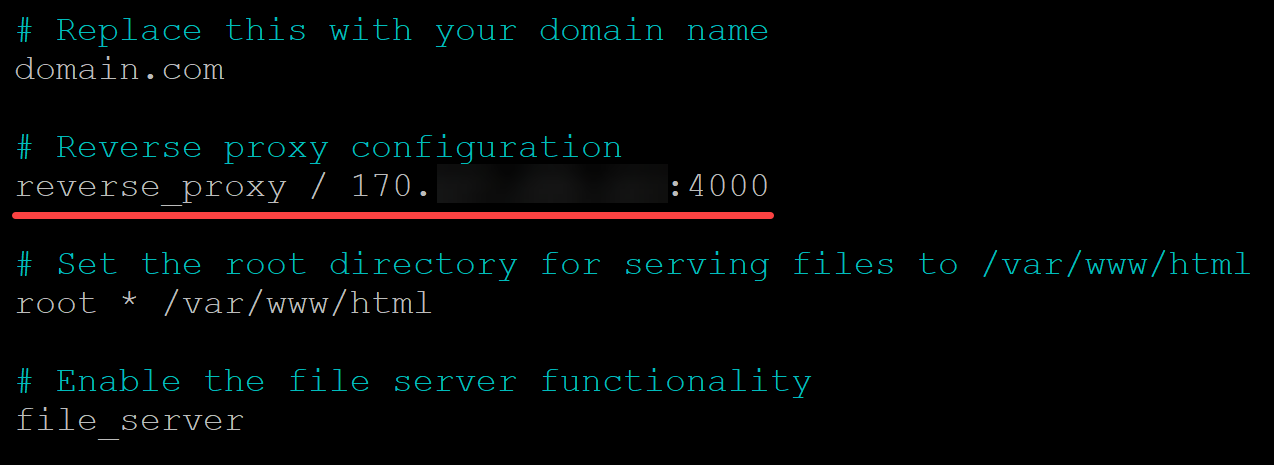
Adding a reverse proxy configuration
5. Now, reload Caddy’s configuration so the changes can take effect and run the flask application again.
sudo systemctl reload caddypython3 app.py6. Finally, visit your domain (i.e., mercyio.xyz), and you will be served the Hello response from your Flask application securely over HTTPS.

Accessing the Flask application
You will also see the following GET request on your terminal.
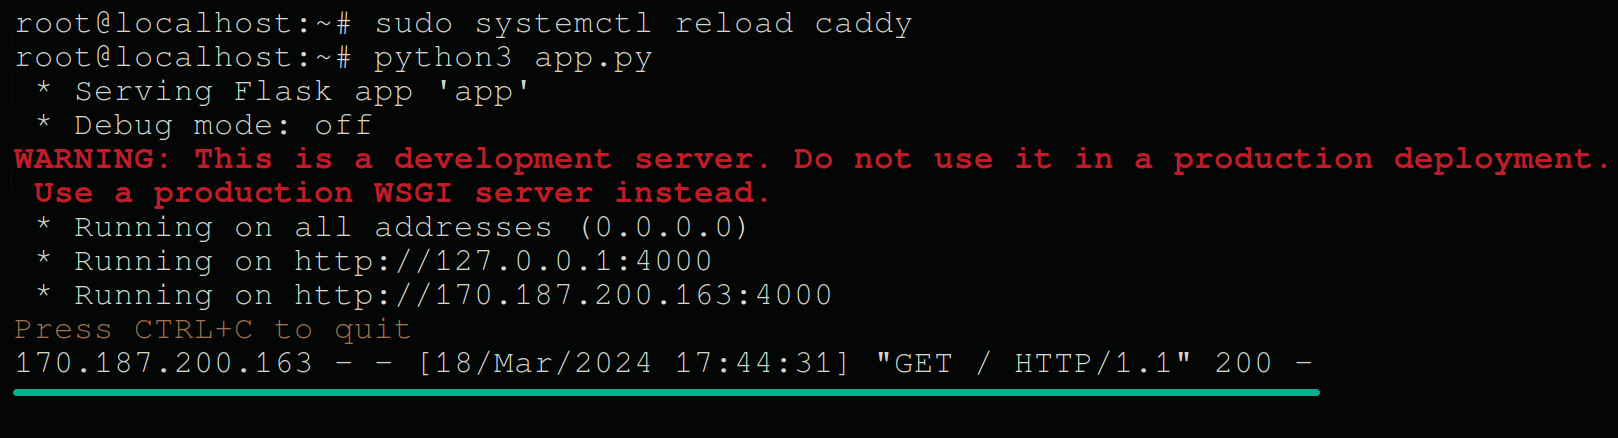
Viewing GET requests in Flask
Conclusion
You have just unlocked the door to a new level of web deployment efficiency with the Caddy web server. From installing the web server to maneuvering it into a reverse proxy powerhouse, you have covered some solid ground. But guess what? What you have witnessed in this tutorial is merely the beginning.
Now that you have learned the basics that make Caddy an excellent choice for modern web deployments, it is time to level up. Take a deeper dive into Caddy’s documentation and unearth the hidden gems of its feature set.
How about running Caddy in a Docker container? Or perhaps further automate your deployment workflows by integrating Caddy configurations and reloads into your CI/CD pipelines?